
New Consul plugin for Tiller
Updated:
Note : This page may contain outdated information and/or broken links; some of the formatting may be mangled due to the many different code-bases this site has been through in over 20 years; my opinions may have changed etc. etc.
It’s only a minor version number bump, but Tiller 0.7.8 now brings a major new plugin which I’m really excited about : It now supports the awesome Consul system from Hashicorp. Consul is a distributed key/value store and service discovery mechanism - the basic idea is that you have a Consul cluster consisting of multiple nodes for high availability and performance. You then place all your configuration values in it, and also register your services (like web server backends, databases, cache nodes and so on) with it. This means you can have a dynamic environment where components discover their configuration and other nodes in your infrastructure on-the-fly: no more hard-coding database URIs or load balancer pools!
This makes it an ideal fit for a “cloud” Docker environment using something like Swarm, Kubernetes or Mesosphere/Marathon. Your containers can run on any host, advertise whatever ports they like, and Consul will make sure that everything can find what it needs to. The only sticking point is how to get your configuration to your applications.
If you’re writing your own microservices from scratch, you can of course talk directly to the Consul API, but for other things that require configuration files (Nginx, Apache, Rails applications and so on) you need a tool to talk to Consul and generate the files for you. Hashicorp (the company behind Consul) do have a tool called consul-template which does this, but Tiller has (to my admittedly biased point of view!) several advantages, not least the ability to use straight-forward Ruby ERB templates and embedded Ruby code instead of Go template syntax, and the ability to load other data source plugins.
So you although you can fetch everything from Consul, Tiller lets you do things like store templates in files or retrieve them from a HTTP web service, and then “chain” key/value stores : Provide values from defaults files first, then check Consul, and finally over-ride some settings from environment variables at run-time.
If you’re new to Tiller, I recommend having a quick look at the documentation, and following some of my Tiller blog posts, in particular this article which walks through a practical example of using Tiller inside Docker.
That said, here follows a quick example of using Tiller to fetch data from Consul. In the examples below, I’m just generating some demonstration template files for simplicity. In a real-world situation, these template files would be application configuration files like nginx.conf, mongod.conf and so on.
Getting started
The Tiller Consul plugin requires the diplomat Ruby gem to be installed, so assuming you have a working Ruby environment, this should be all you need:
$ gem install diplomat tiller
Successfully installed diplomat-0.17.0
Successfully installed tiller-0.7.8
2 gems installed
Start a Consul server
Go to the Consul downloads page, and grab both the Web UI and binary download for your platform, and unzip them in the same location. I’ll do this with shell commands below, for the Mac OS platform (replace “darwin” with “linux” if you are using a Linux system):
$ mkdir consul
$ cd consul
$ wget https://releases.hashicorp.com/consul/0.6.4/consul_0.6.4_web_ui.zip
$ wget https://releases.hashicorp.com/consul/0.6.4/consul_0.6.4_darwin_amd64.zip
$ for z in *.zip; do unzip $z; done
Now, start up Consul in stand-alone mode :
$ ./consul agent -server -bootstrap \
  -client=0.0.0.0 -data-dir=./data \
  -ui -ui-dir=. -advertise=127.0.0.1
You’ll see some startup messages :
==> WARNING: Bootstrap mode enabled! Do not enable unless necessary
==> Starting Consul agent...
==> Starting Consul agent RPC...
==> Consul agent running!
         Node name: 'mdr.local'
        Datacenter: 'dc1'
            Server: true (bootstrap: true)
       Client Addr: 0.0.0.0 (HTTP: 8500, HTTPS: -1, DNS: 8600, RPC: 8400)
      Cluster Addr: 127.0.0.1 (LAN: 8301, WAN: 8302)
    Gossip encrypt: false, RPC-TLS: false, TLS-Incoming: false
             Atlas: <disabled>

==> Log data will now stream in as it occurs:

    2016/05/12 19:56:14 [INFO] raft: Node at 127.0.0.1:8300 [Follower] entering Follower state
Leave this process running in your shell, and with a browser check your server is up and running by visiting http://localhost:8500/ui. You should see a screen similar to the following :
![]()
We’ll now populate it with some test data. I have a script to do this, so download and run it, passing the base URL to your Consul server as the only argument :
$ wget https://raw.githubusercontent.com/markround/tiller/master/features/support/consul_test_data.rb
$ chmod +x consul_test_data.rb
$ ./consul_test_data.rb http://localhost:8500
Populating Consul at http://localhost:8500 with test data
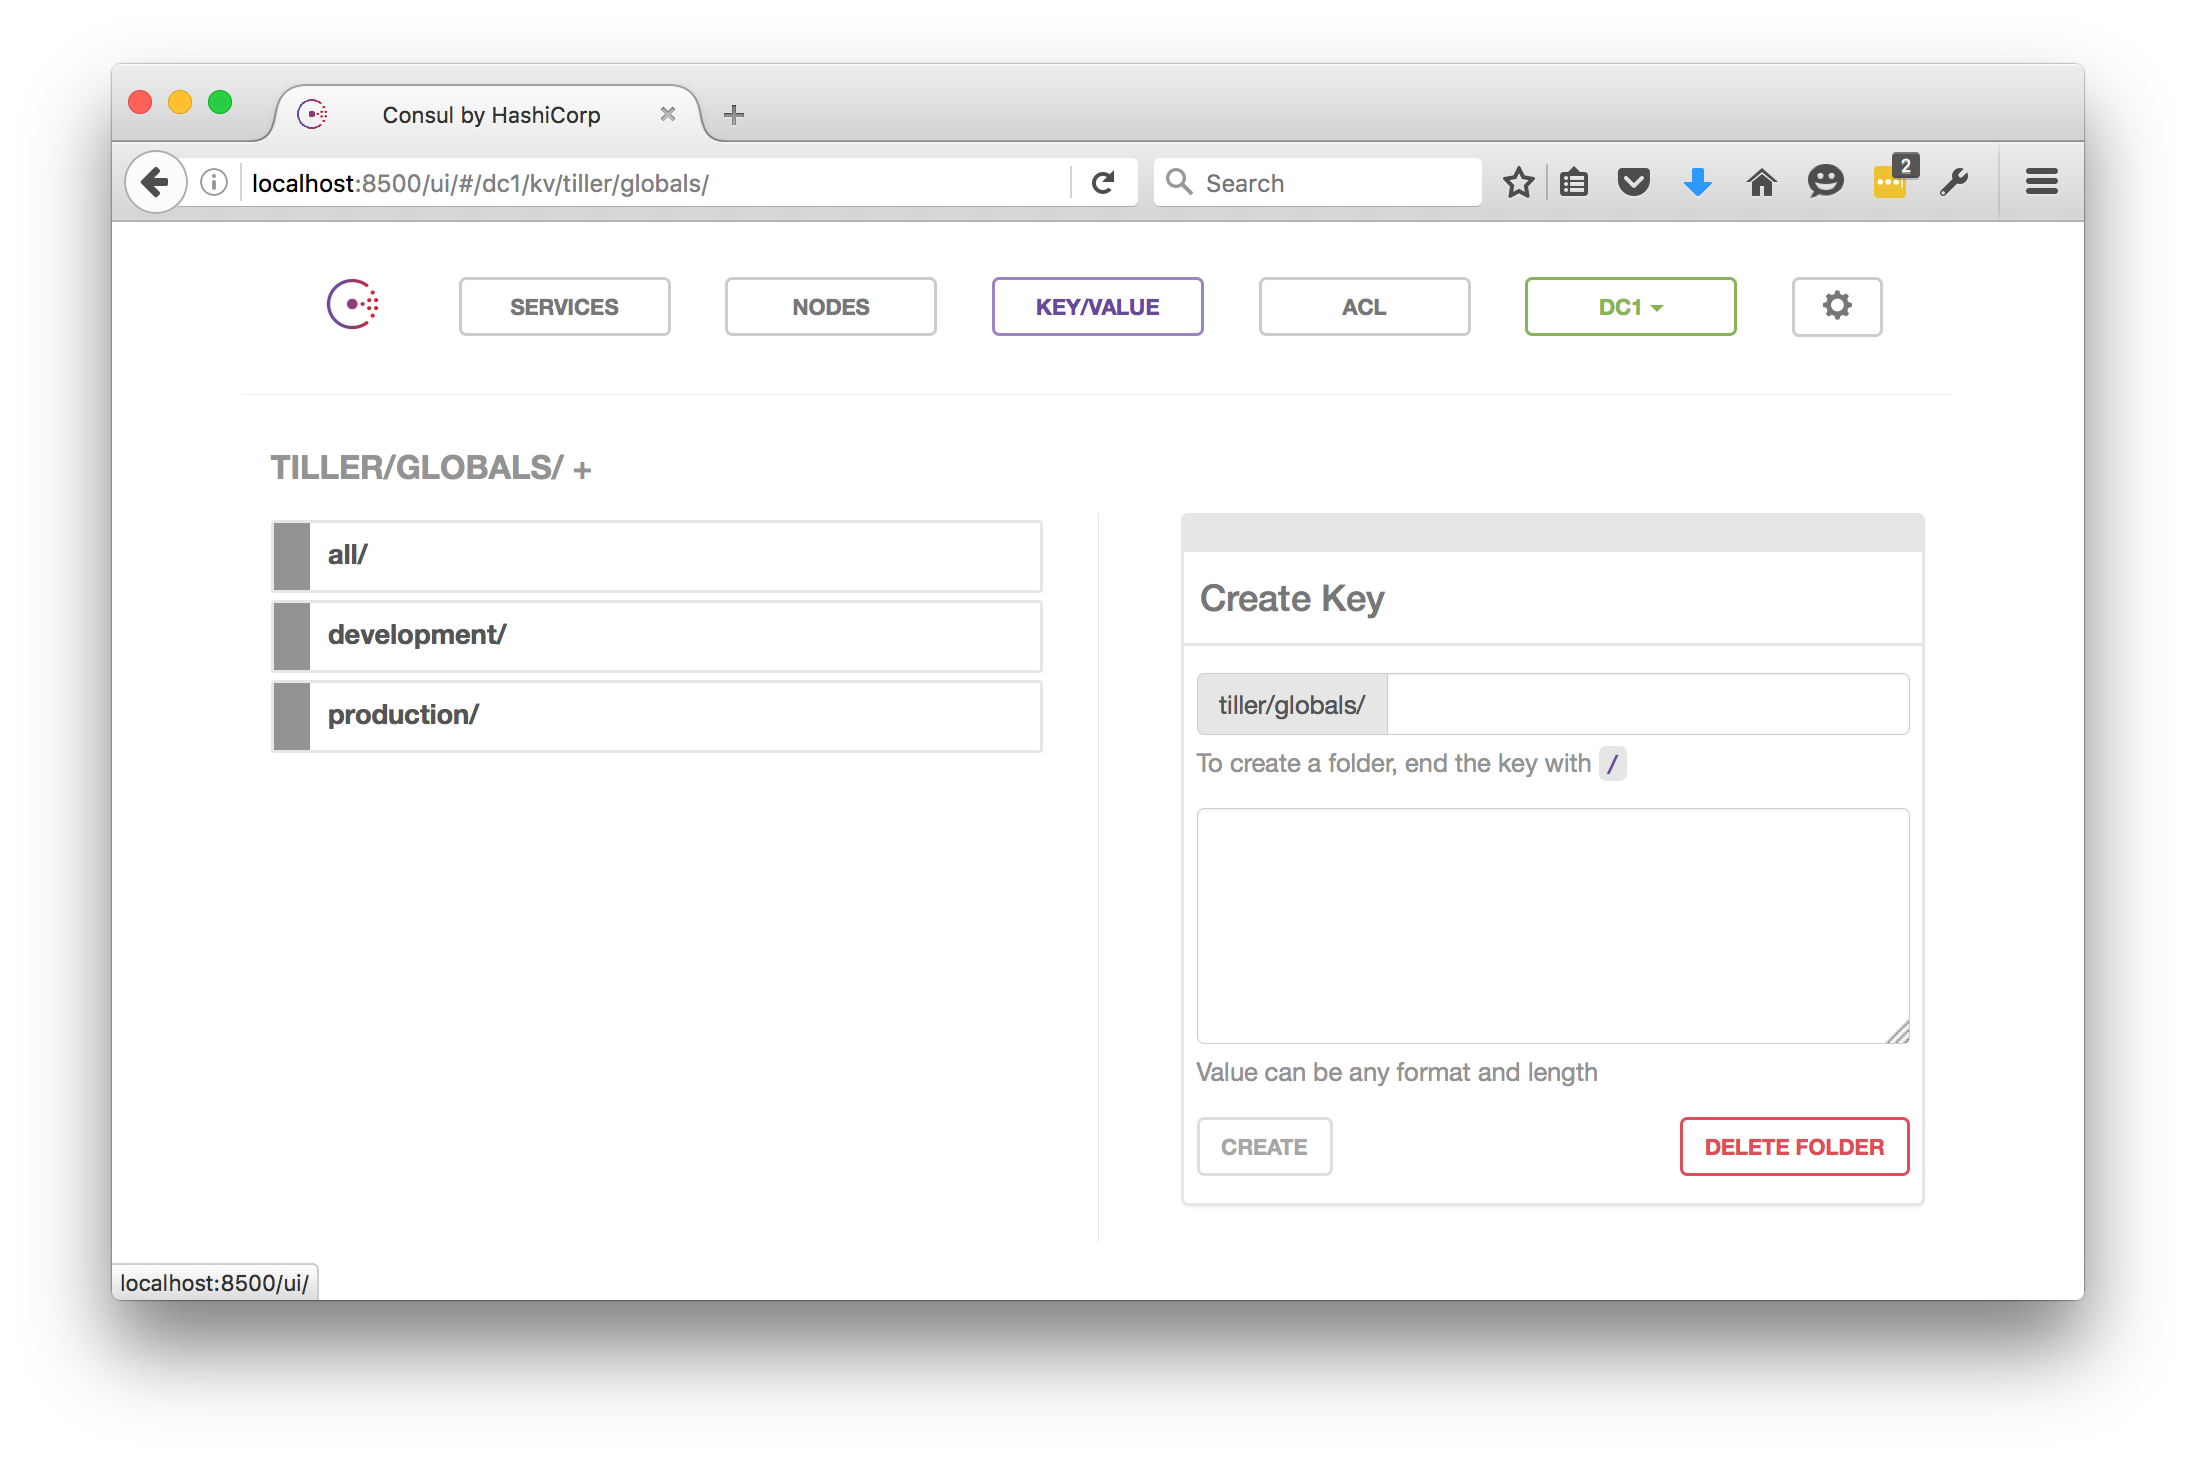
Now, if you visit your Consul page and click on the “Key / Value” link at the top, you’ll see a bunch of data under the /tiller path. Here’s the view of the global values :
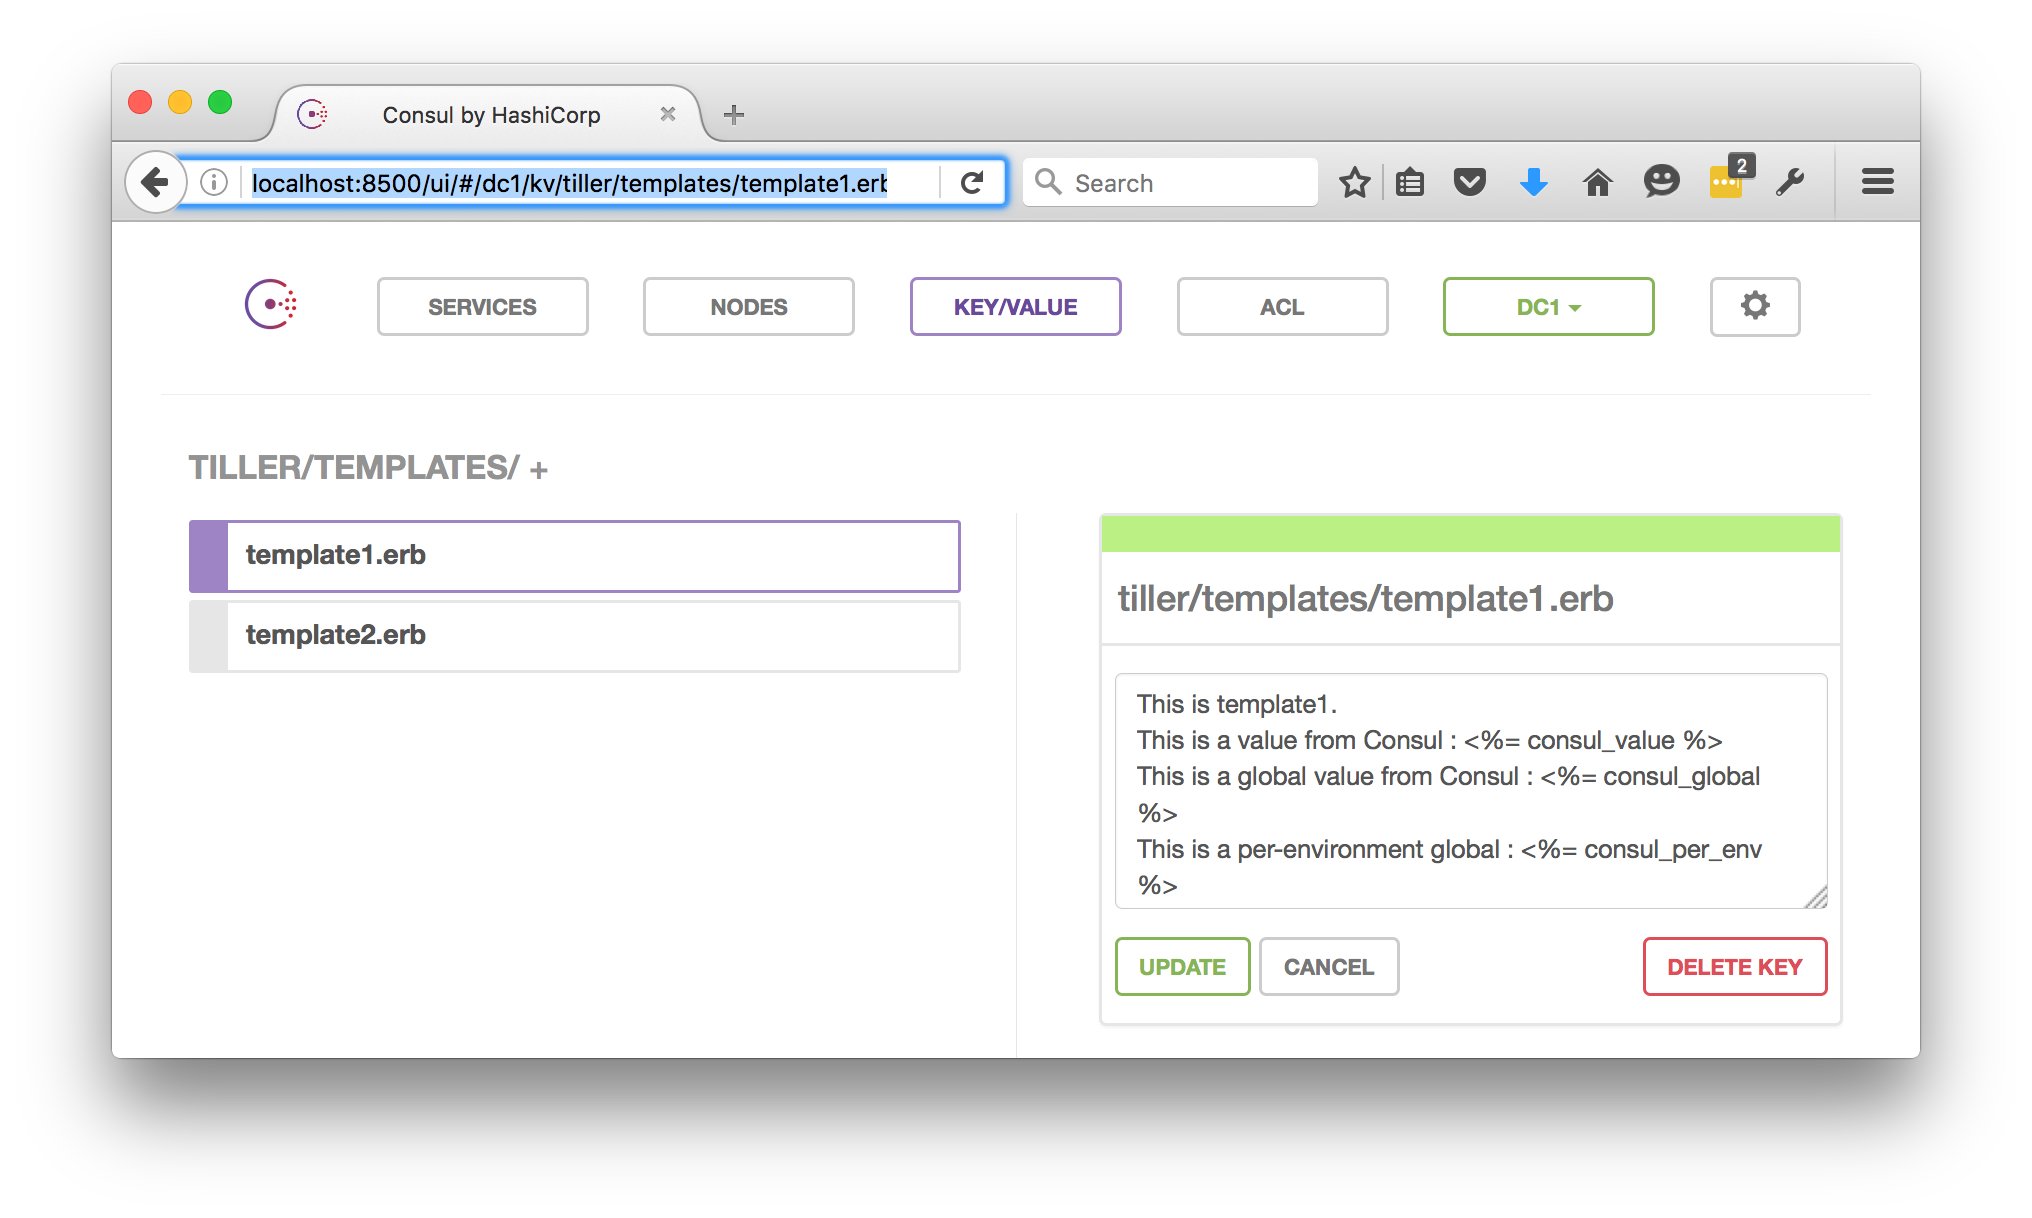
And if you click around further, you can find the template definitions also stored in Consul :
Incidentally, this is the same data that is used in my automated tests that check all the features of Tiller are working correctly whenever I make any changes. You can see the results of these tests over at Travis CI, or run them yourself if you clone the Git source and run bundle exec rake features
Tiller setup
Now your Consul server is ready to go, so here’s how to hook Tiller up to it. Just create your common.yaml file with the following contents (just running “true” after we’ve finished for demonstration purposes - in a real Docker container, this would be your application or webserver binary etc.):
1
2
3
4
5
6
7
8
9
---
exec: ["true"]
data_sources: ["consul"]
template_sources: [ "consul" ]

consul:
  url: "http://127.0.0.1:8500"
  register_services: true
  register_nodes: true
And run Tiller against it, using the “development” environment :
$ tiller -b . -v -e development
tiller v0.7.8 (https://github.com/markround/tiller) <[email protected]>
Using configuration from .
Using plugins from /usr/local/lib/tiller
Using environment development
Template sources loaded [ConsulTemplateSource]
Data sources loaded [ConsulDataSource]
Available templates : ["template1.erb", "template2.erb"]
...
...
Child process exited with status 0
Child process finished, Tiller is stopping.
And there you have it. You’ll have ended up with a couple of files : template1.txt and template2.txt in your current directory, which have been entirely populated with templates and values all served from Consul:
$ cat template1.txt

This is template1.
This is a value from Consul : development value from consul for template1.erb
This is a global value from Consul : consul global value
This is a per-environment global : This is over-written for template1 in development
If we have enabled node and service registration, these follow.
Nodes : {"mdr.local"=>"127.0.0.1"}
Services : {"consul"=>[#<OpenStruct Node="mdr.local", Address="127.0.0.1",
ServiceID="consul", ServiceName="consul", ServiceTags=[], ServiceAddress="",
ServicePort=8300, ServiceEnableTagOverride=false, CreateIndex=3, ModifyIndex=4>]}
Have a try at running Tiller with the “production” environment and see what changes. You can also try changing the values or even the templates themselves inside Consul to see the changes reflected whenever you run Tiller.
What next ?
So, assuming you’re using Tiller as a Docker CMD or ENTRYPOINT to generate your configuration files before handing over to a replacement process, you can now create dynamic containers that are populated with data entirely from a Consul cluster. Or you can chain one of the many other plugins (environment, environment_json, defaults, file and so on) together, so your container can get core values from variety of sources.
You can also make use of Consul’s service registration system (perhaps by using the fantastic Registrator) and populate your configuration files dynamically with auto-discovered microservice backends and much more.
Check out the full Consul plugin documentation for more information, read the rest of the docs or drop by the new Gitter chatroom for help and advice.
As always, all feedback and comments welcome!