
New Amiga X5000
Updated:
As you may have seen with my latest music project, I’ve been getting back into the Amiga scene in a big way over the last year. Granted, a large part of this is nostalgia on my part; the Amiga was a lifeline to me during my teenage years and was responsible for starting my twin interests of computing and music. But I’ve always been amazed by the sheer tenacity of the Amiga scene - nearly 30 years on from when I first got my Amiga 600, the scene is still going (albeit fractured into different camps) and new systems are still being created for this legendary platform.
Sadly, my A1200 recently died and while I haven’t given up on it yet, it’s going to take me some time to source spare parts and experiment with fixing it. This left a large Amiga-shaped hole to be filled, and I’ve always been fascinated by the next-gen PPC systems. I finally took the plunge and ordered my maxed-out X5000 from AmigaKit in the UK, with the aim of getting a more modern, reliable system and moving all my projects from the A1200 over onto it.
Although I used OS 3.x pretty heavily “back in the day”, I jumped ship from the Amiga scene in the late 90s/early 2000s before PPC accelerators had really become wide-spread. I’ve also never had access to the current breed of next-gen PPC systems, so this series of Amiga-related posts is intended to document my adventures and experiments with my new Amiga, from the perspective of an old Amigan getting back into the scene. Hopefully, once I’ve repaired my A1200 there also will be a series of posts on the classic 68k scene. I’m also a little rusty on all things Amiga, so if I’ve made any glaring mistakes please feel free to contact me or leave a comment and I’ll fix it!
While I’m at it, I should give a special mention to two fantastic blogs:
Both of these provided a wealth of information on next-gen systems, and I was particularly pleased to see Epsilon received his X5000 only a few days before I got mine. I know there will be a fair amount of overlap between my blog posts and theirs, but I hope my take on the X5000 will maybe help convince a few more old Amigans to join the party!
Anyway, back to the X5000. About a week after I ordered it, it had been built and tested (great communication from AmigaKit by the way - they’re only a small operation, but I have to hand it to them keeping the Amiga dream alive!) and I received a shipping notification and tracking number. The following day, this very exciting parcel is what turned up on my doorstep:
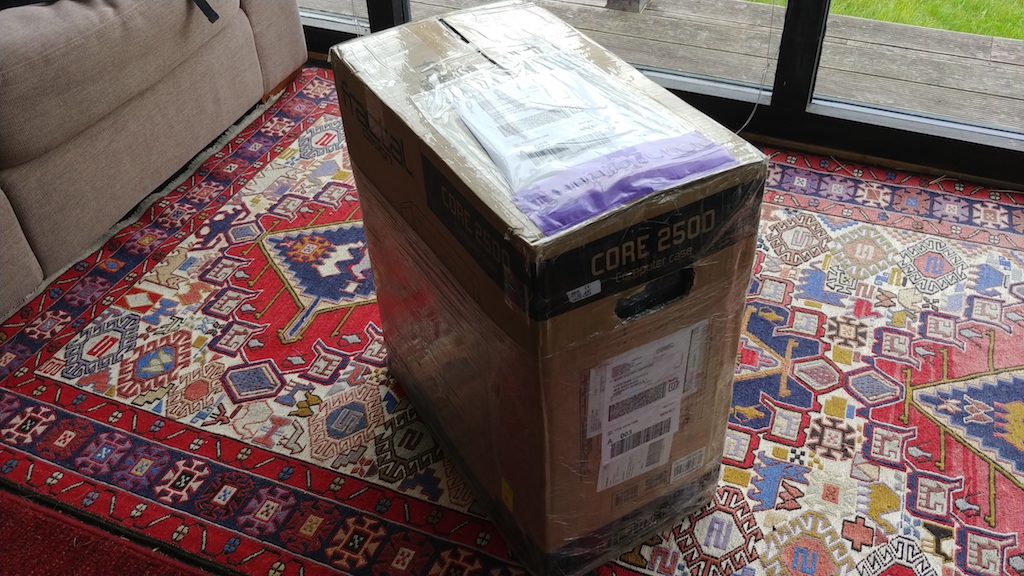
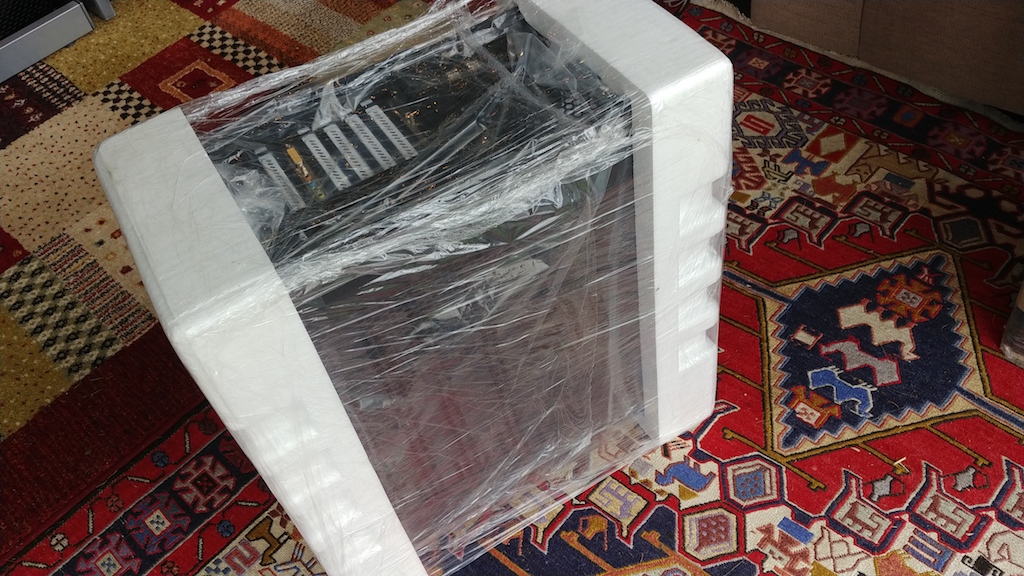
Very well packaged and protected during the journey.
And here’s the assorted collection of “extras” that came with this X5000. The brown cardboard box was taped inside the case, in one of the spare HD slots. Inside was a very useful collection of spare screws, bolts, blanking panels and a cable. I’m not entirely sure what the cable was for, it looked like something left over from the motherboard. I’ll keep it anyway just in case it turns out to be useful!
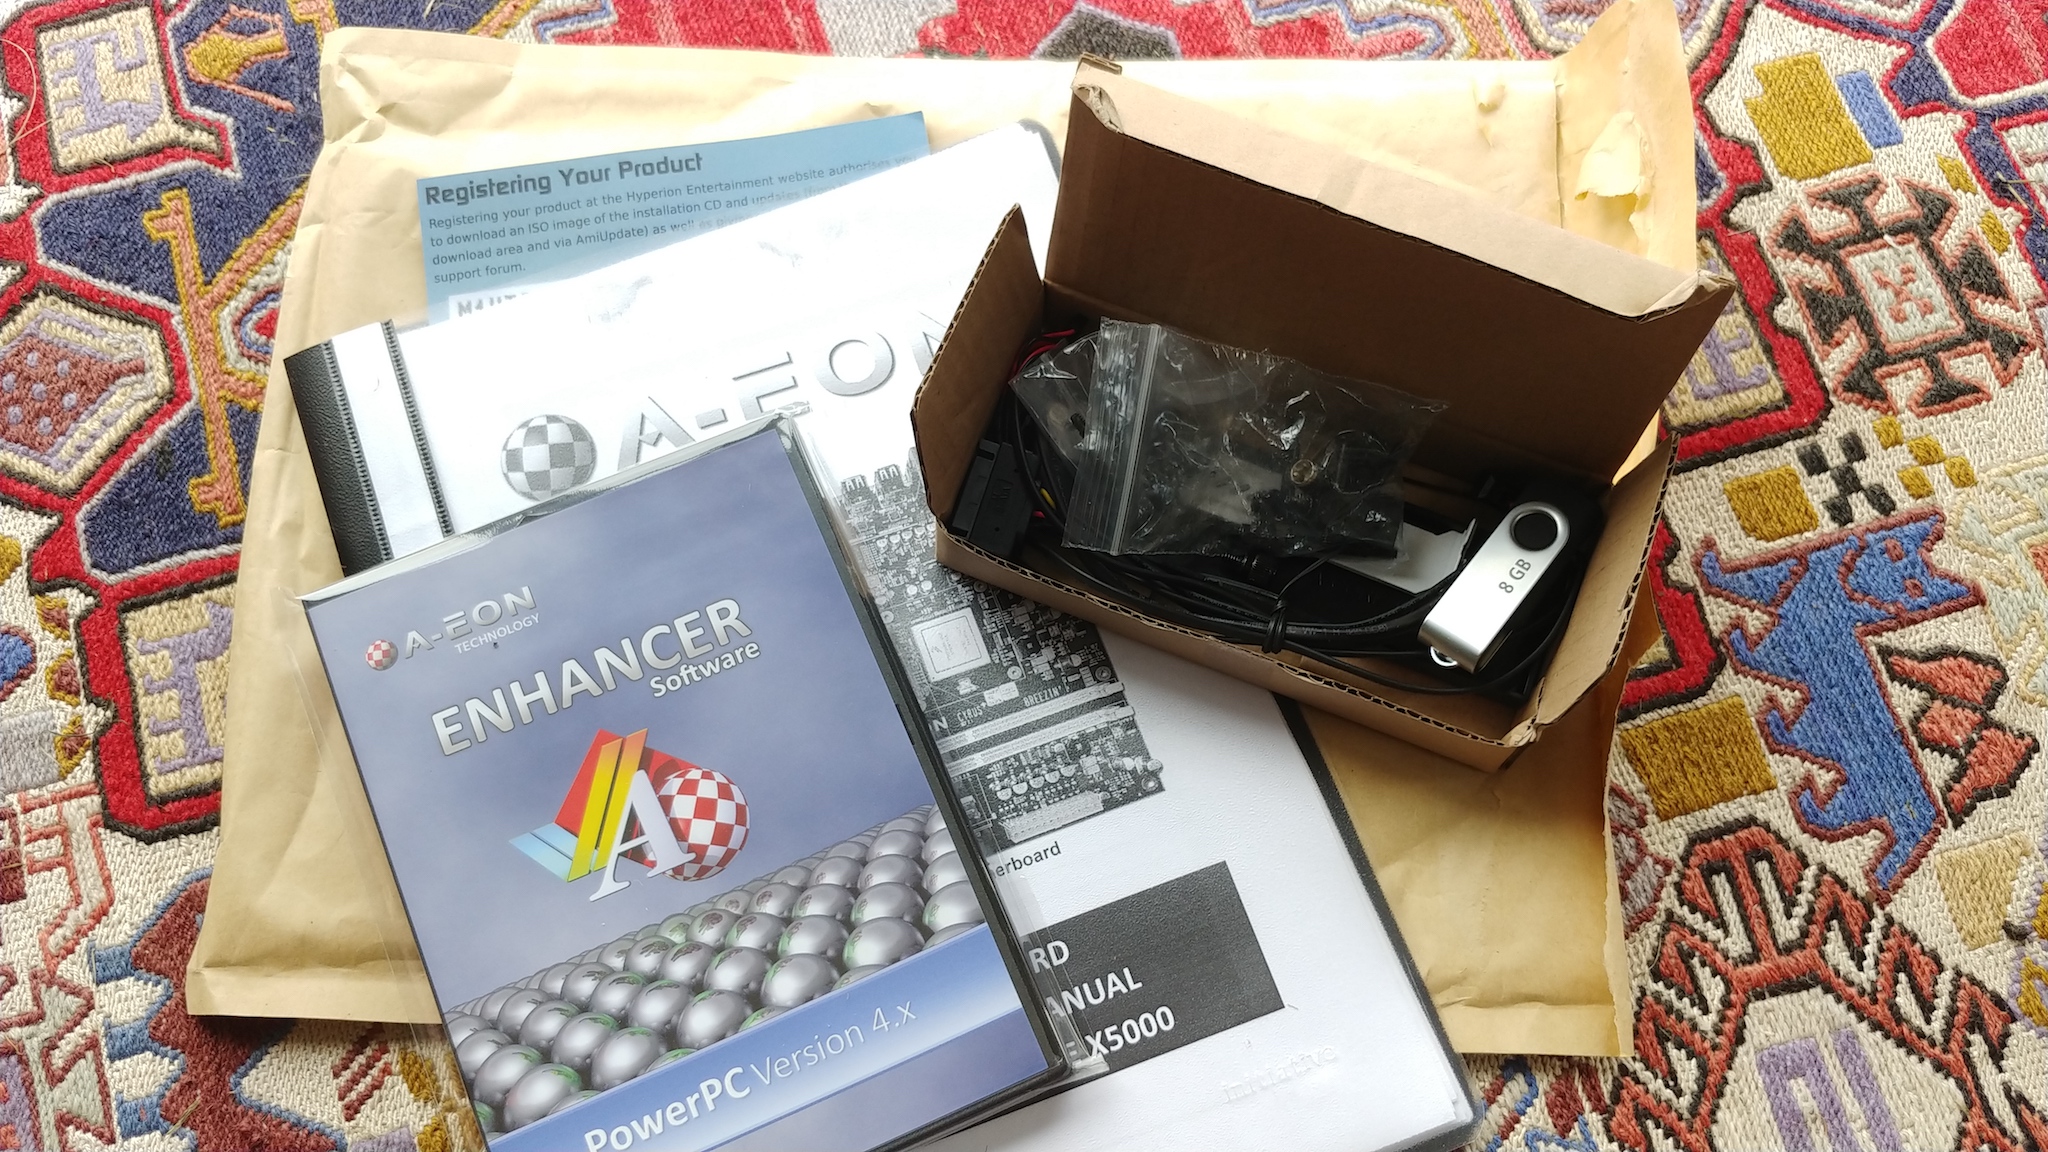
I also received a USB drive pre-installed with AmigaOS 4.1 FE pre-release for the X5000 and A-Eon Enhancer Software. This can be used as a recovery drive, so the first thing I did while I was getting the rest of the kit ready was to copy the contents to my NAS using an Apple Macbook Pro laptop and the dd command, so I have the USB image safe somewhere else in case I ever need it.
As the USB recovery drive comes pre-installed with the Enhancer package, you can also continue to access your SFS/02 partitions and filesystems - apparently, SFS2 support has been dropped from recent updates of AmigaOS 4.1. It seems these days as though Hyperion isn’t really actively developing AmigaOS 4 any further, and therefore much of the updates to drivers and the rest of the OS is now coming directly from A-Eon instead. Having the USB drive pre-installed and ready to boot is a real nice touch as it also boots straight to a desktop like a Linux “live CD”, so can be used for repair work in case you muck something up like your startup-sequence and need a way to edit it.
Along with the USB drive, I also receieved a registration card for AmigaOS, a DVD copy of the Enhancer Pack, and a printed manual for the motherboard. Creating an account and registering on the Hyperion website also gave me access to a ISO image download of “Amiga OS 4.1 Final Edition Pre-Release”, which I also downloaded to keep safe. I don’t think I’ll ever use this image as the USB recovery stick has everything I need on it, but it’s nice to have anyway.
Speaking of the motherboard, here’s a shot looking down on the inside of the X5000 after I removed the side panel to check everything was properly connected:
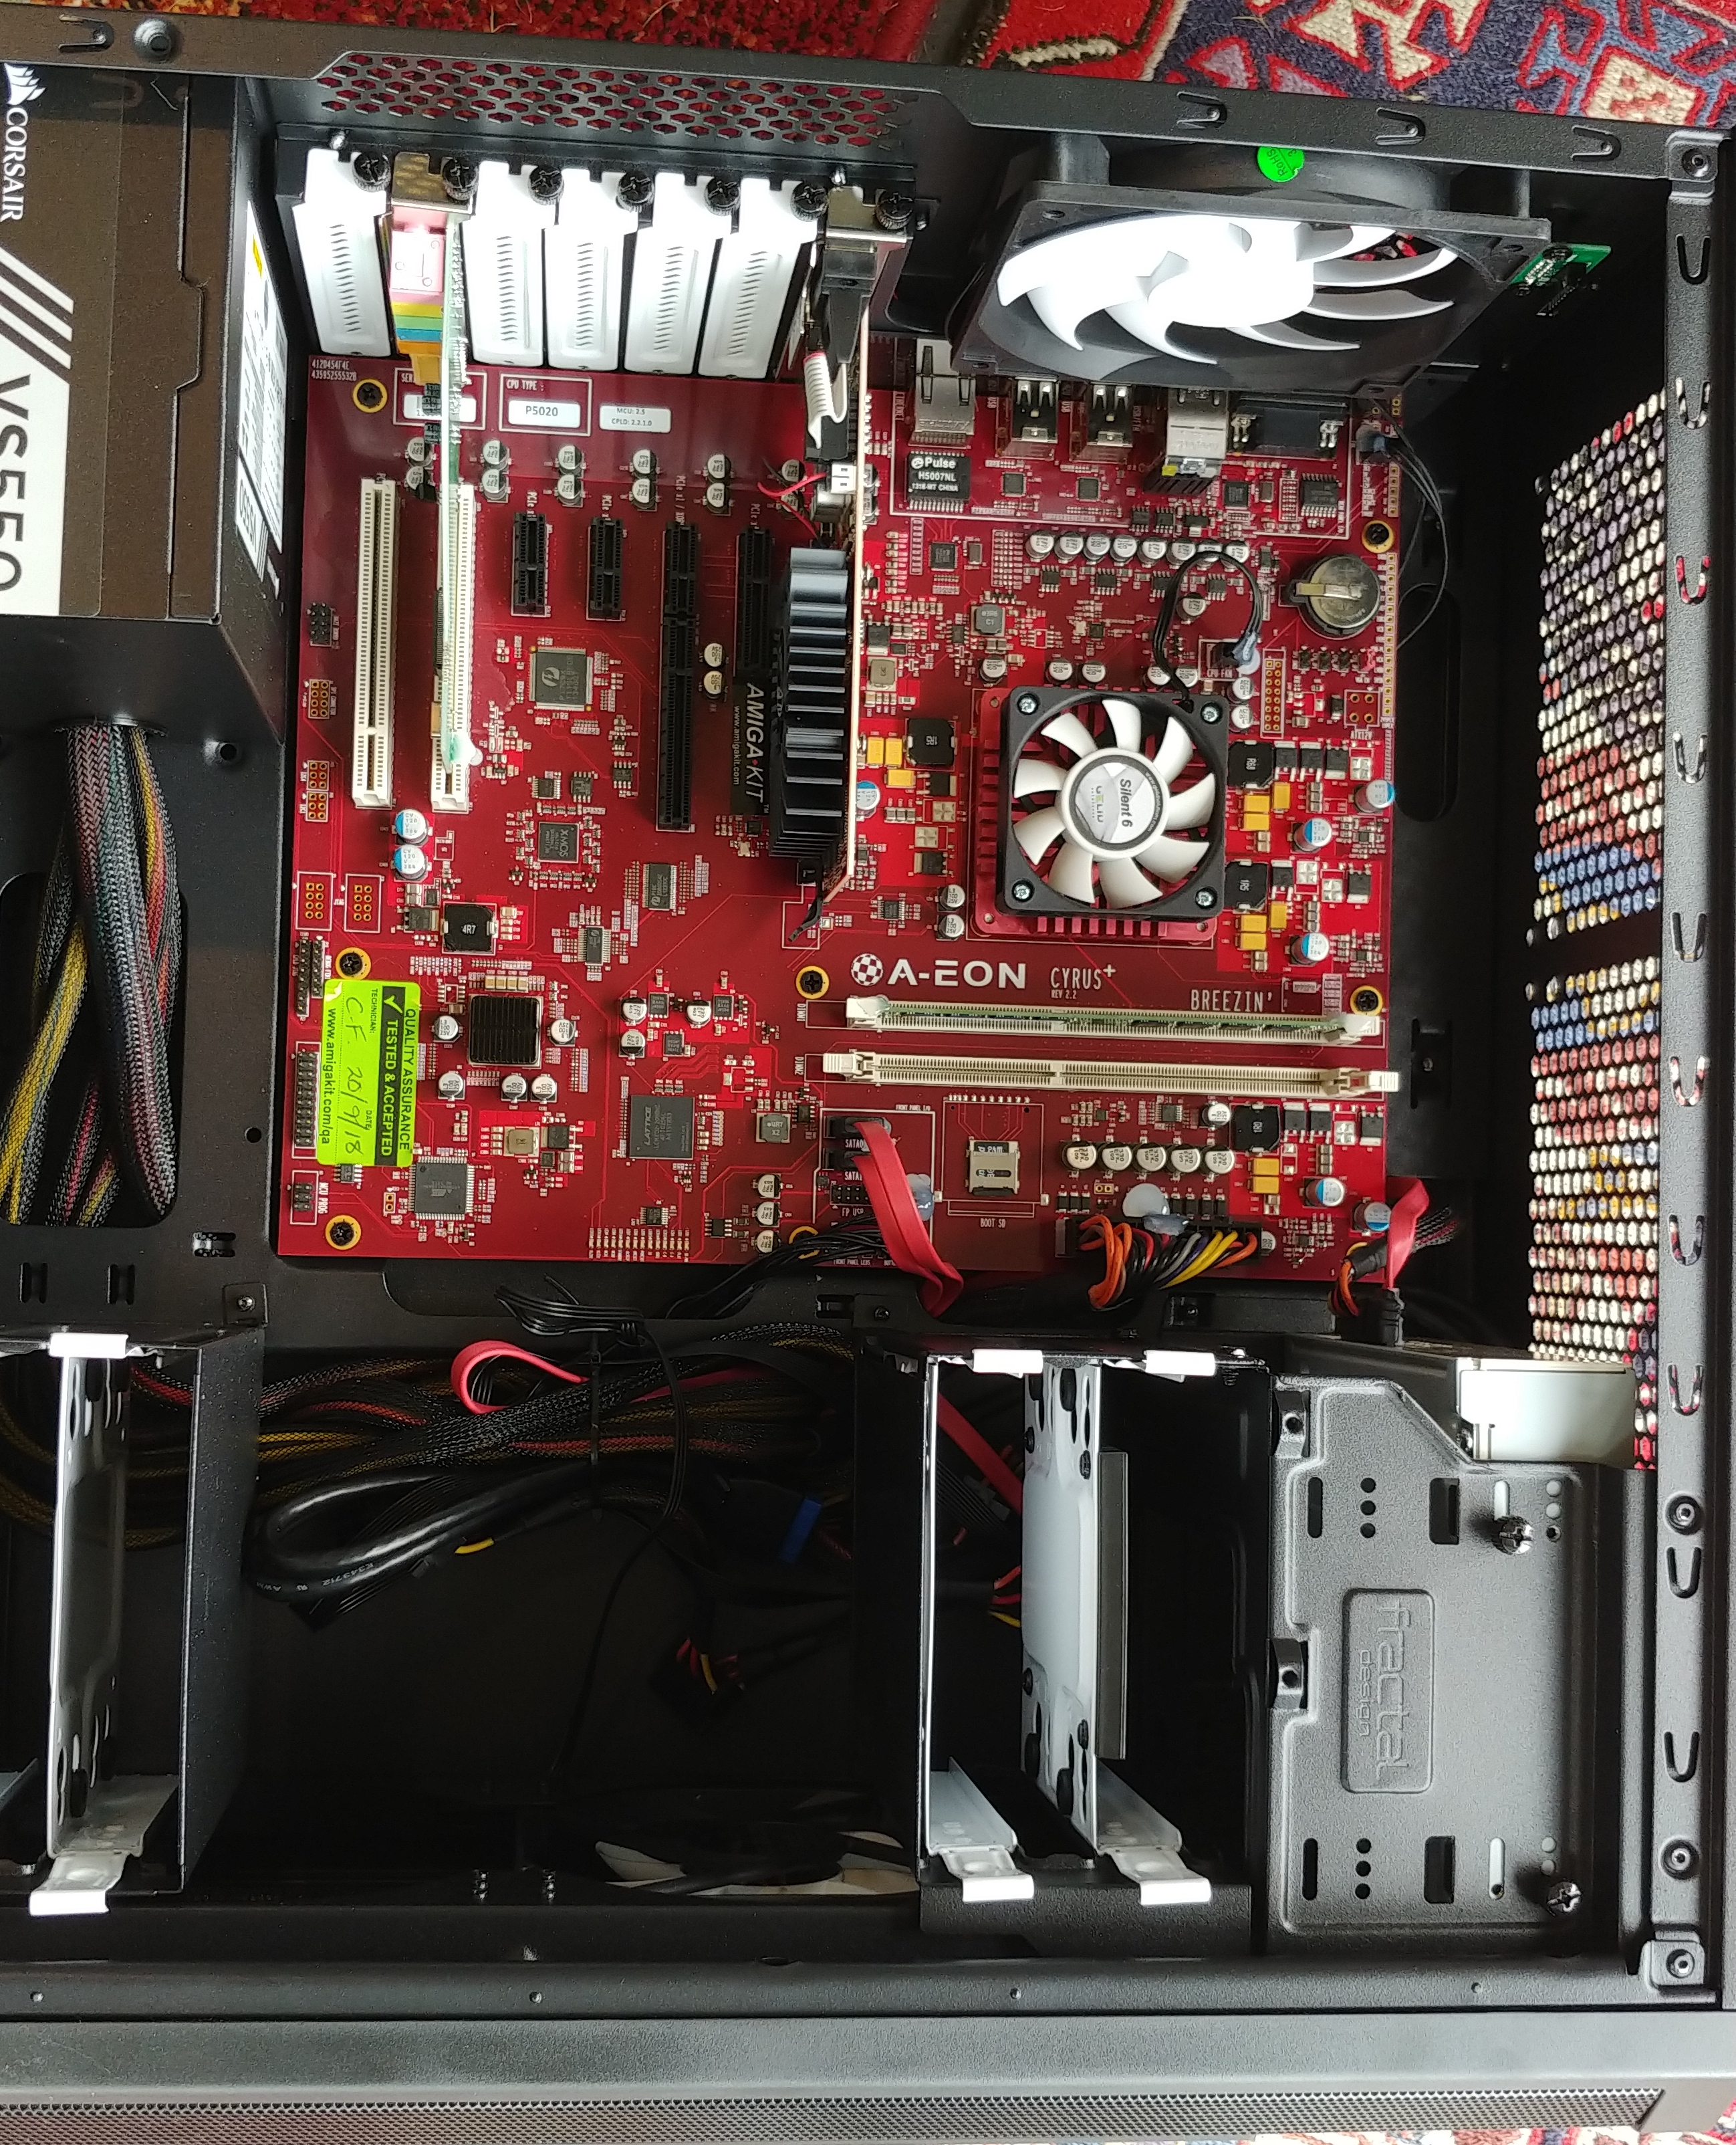
A nice, tidy case with plenty of room for expansion! There’s a single stick of RAM and a PCI sound card along with the PCIe RadeonHD graphics card pre-installed.
I then put the cover back on, connected my USB mouse and keyboard (Logitech K120) to the top two black USB sockets at the rear, hooked up power and turned the system on. I was greeted with the awesome animated boot logo:
![]()
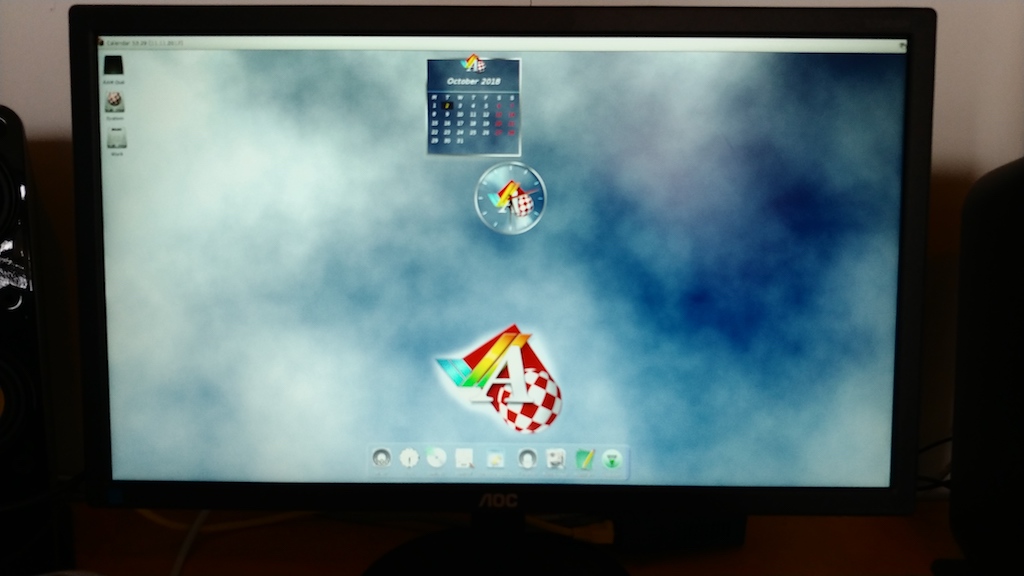
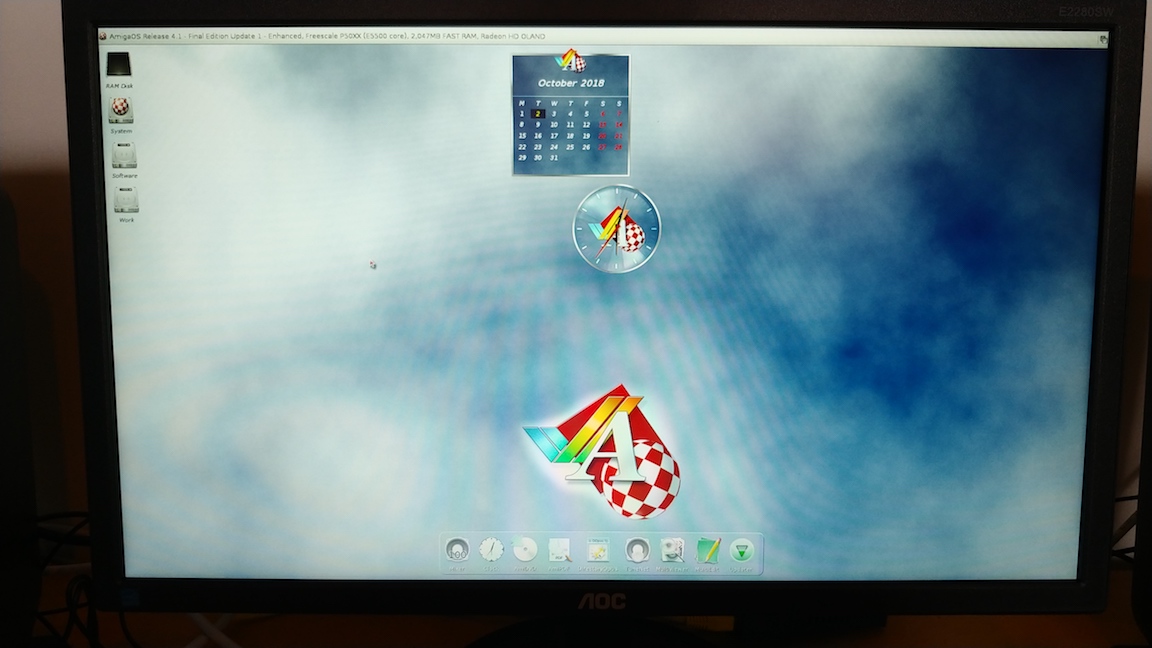
Once the ball starts spinning, you can press the space key to get at the early-boot menu, or you can simply wait and after some seconds it boots straight into AmigaOS. Under a minute later, I was looking at my brand new Workbench! An awesome moment, and I was really excited to start exploring the new OS and machine. Note that my “screenshots” at this step are all taken with my phone camera as I was going to reformat and re-partition my drives so didn’t yet want to mess around with taking screengrabs and worrying how to transfer them across.
Anyway, here’s what I saw after first boot - a 1290x1080 HD workbench with an animated “CANDI” background and a few widgets like the clock and calendar:
One thing to note is that the keyboard didn’t seem to function as expected unless it was plugged into one of the black USB ports. I could type OK, and it worked in the U-boot environment, but the Windows keys weren’t recognised as “Amiga” keys, and I also had problems with the other modifier keys like Ctrl and Alt not being recognised. Moving the keyboard to the black USB ports seemed to resolve this, though.
I clicked around a few drawers and experimented with some of the included programs, but had to stop the fun as I had work to do installing an additional SSD before I could really continue. My plan was to keep the SSD shipped with the X5000 as a “System and Software” volume, and install a second SSD for my Work volume. I also planned on making room for some additional partitions which I may require later if I wanted to experiment with MorphOS or different filesystems.
Pretty much any SSD should work, but I decided on a Samsung EVO as I’ve had good experience with them in the past. here’s my new Samsung SSD installed in one of the spare mounting brackets from the X5000:
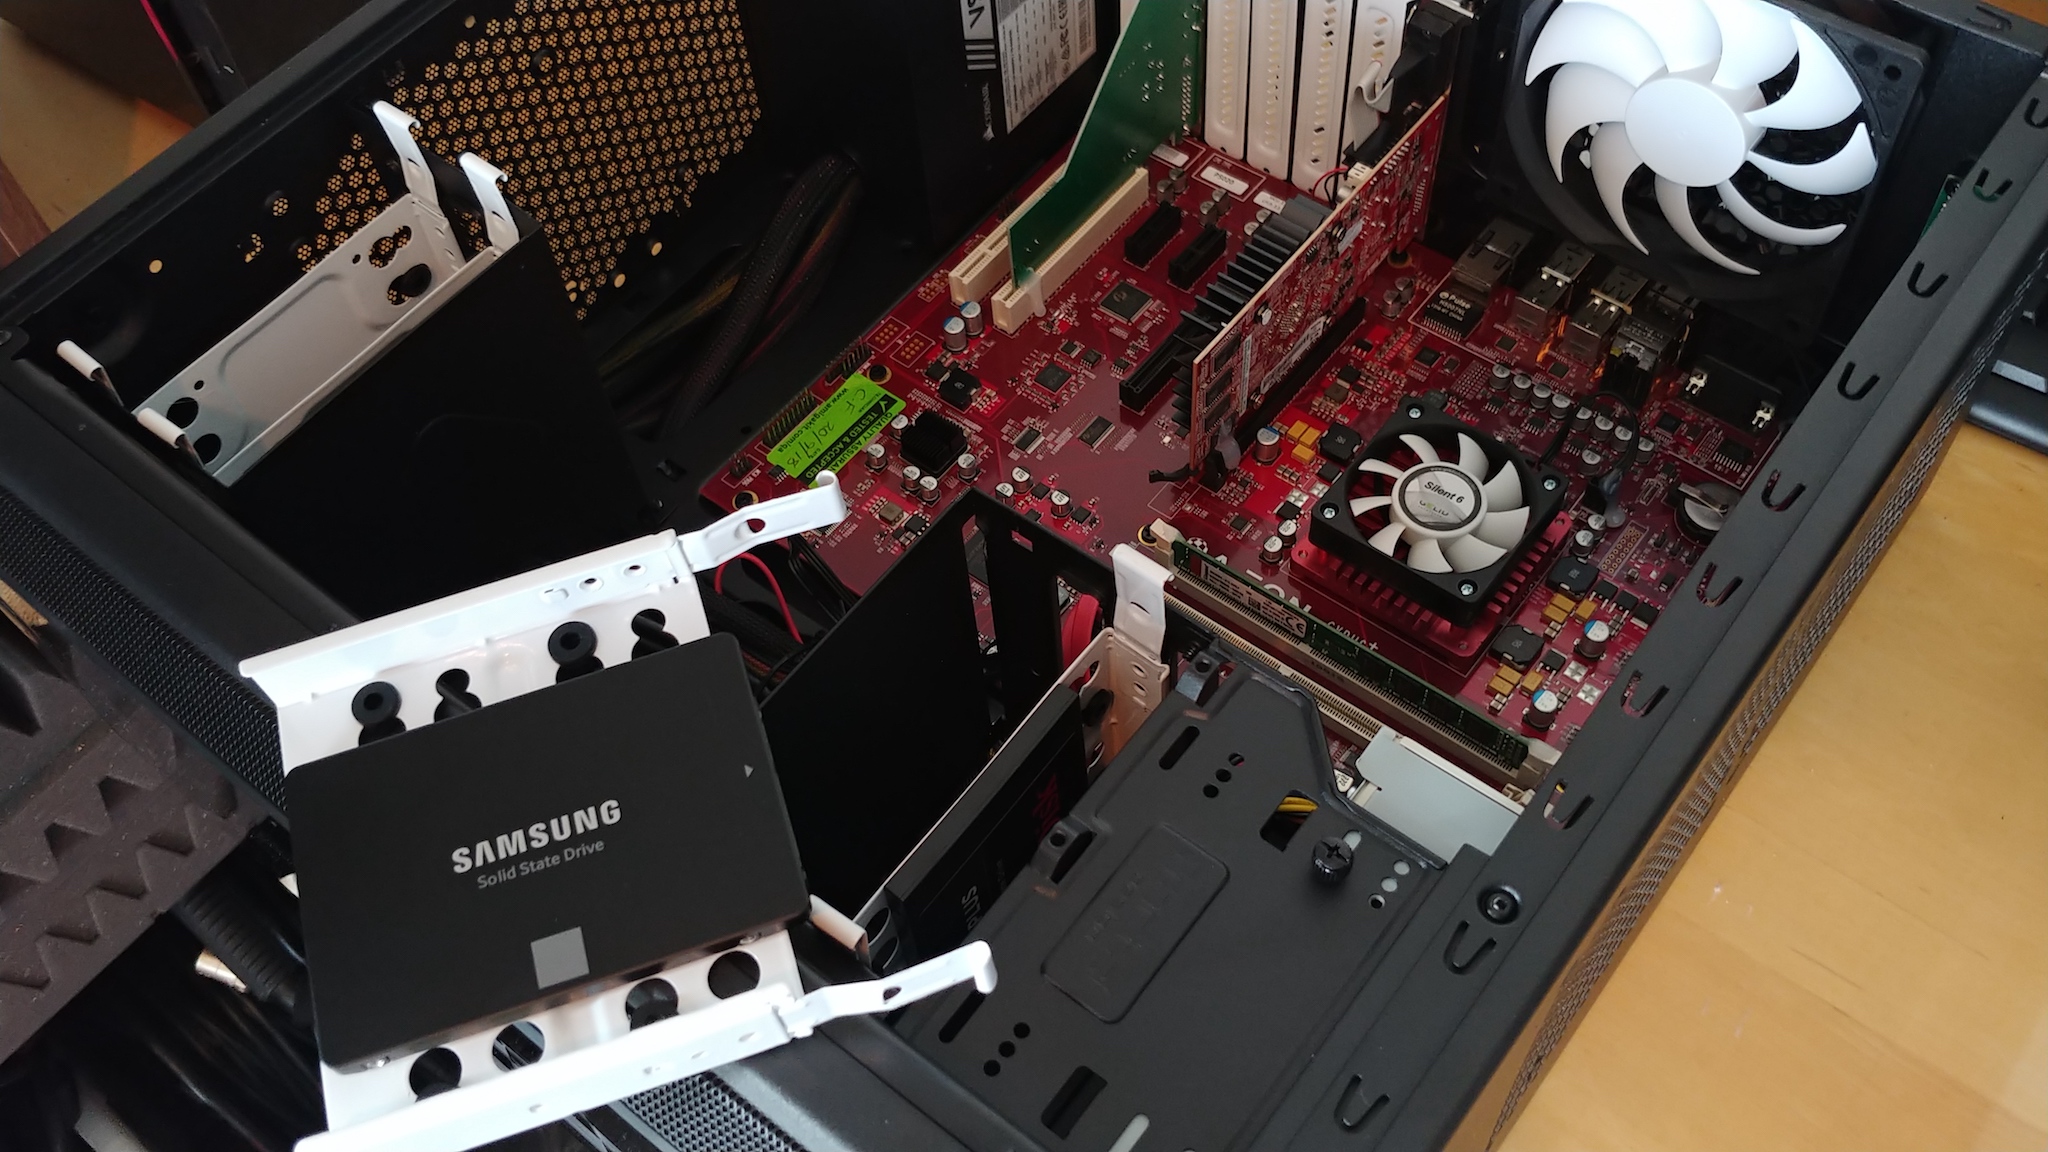
I then had to remove the other side-panel so I could access the bundle of SATA and power cables that had been cable-tied neatly together. First step was to free these up by cutting some ties so I had enough room to move cables around to their desired position. As the motherboard only has two SATA connectors, my plan was simply to disconnect the DVD drive (I very rarely use optical media these days) and use that SATA port for my new SSD. I’ll later add an additional supported PCI SATA controller so I can re-connect the DVD drive and maybe an additional drive for later use.
Here’s my new drive in place with SATA and power connected:

There was, however, a small problem I encountered during this work!
When I looked closely at the SATA connectors, I noticed that glue had been applied around them. You can see this in the close-up image below; presumably this was to stop connectors coming loose in transit. This was a good idea, but it made things a little difficult when it came to moving things around inside.
Anyway, the connector plugged into the DVD drive was pretty firmly glued at the DVD end, so I decided instead to leave that end of the connector in place and remove the cable from the motherboard end. I carefully applied gentle pressure to pull the cable free from the motherboard and - disaster! The SATA socket actually lifted clear off the motherboard, still attached to the cable and leaving some very gentle looking pins exposed. Argh! It seems the SATA connectors (and maybe others) are not firmly held in place on the board like they are on most PC motherboards I’ve previously used.
I stopped what I was doing, calmed down, made myself a coffee and then went back to work (making very, very certain I was earthed with an anti-static wristband) and carefully pushed the SATA connector back onto the motherboard pins with the help of a magnifying glass and a pair of insulated tweezers I got from an old toolset. It eventually slotted home without damaging or bending any of the pins and I was good to go; a hair-raising moment though and I’d advise extreme caution when attempting this on any X5000 motherboard!

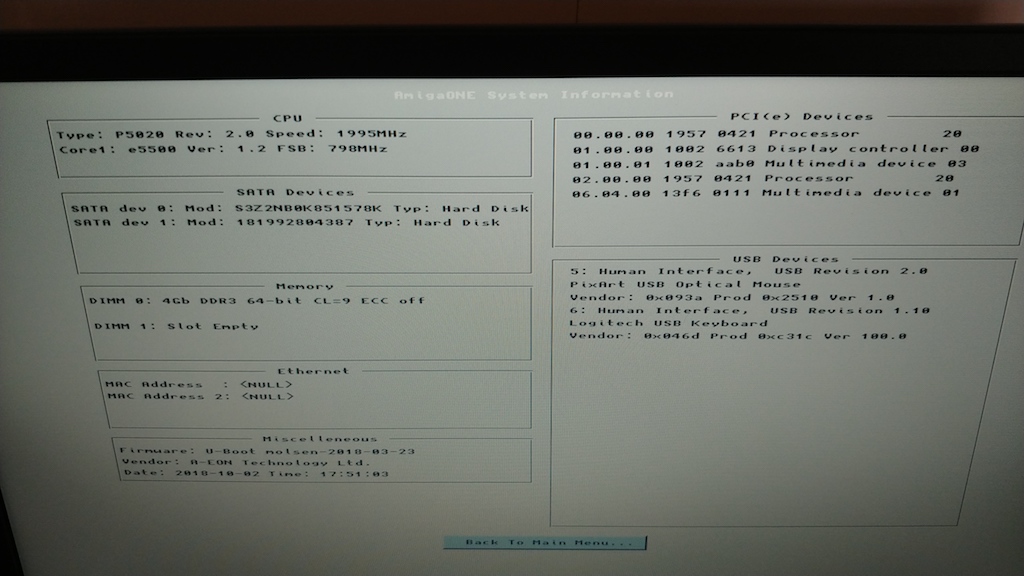
So, with my new SSD attached I quickly checked everything looked OK from Uboot. I simply pressed the space bar when the boing ball started spinning, and selected the System Information menu option. I saw the following screen displayed which confirmed my new SSD drive was recognised:
So, now on to partitioning and laying things out to my usual preferences. On all my Amigas, I usually have 3 partitions :
- DH0: (System) : Boot drive containing the OS and essential libs
- DH1: (Software) : All programs, games, 3rd party libs etc.
- DH2: (Work) : My equivalent of a “Home” directory. Pictures, music, downloads, code projects etc.
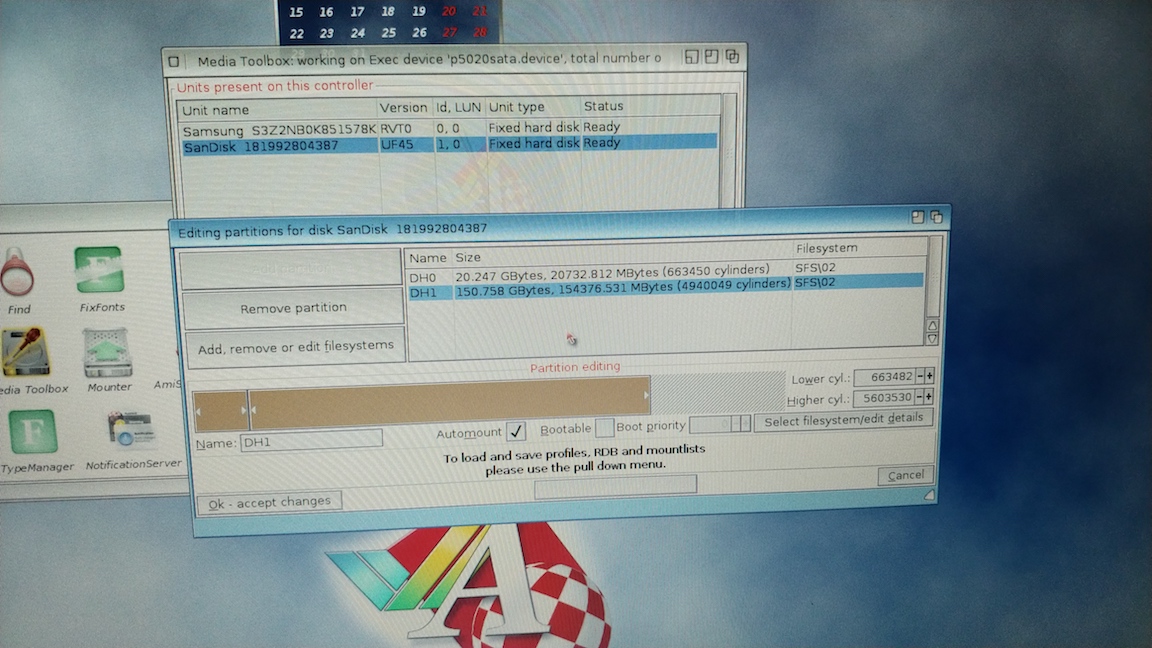
The X5000 came with a single 240GB SanDisk SSD installed, and this was the default partition layout:
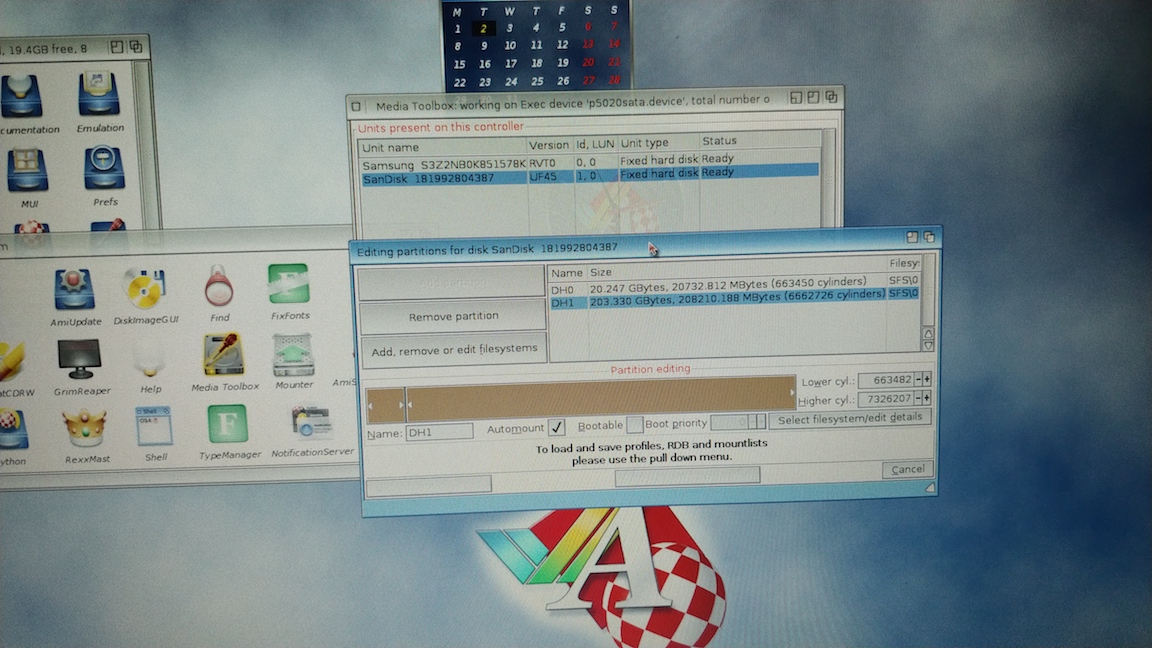
There was one 20GB System partition, and the remainder of the disk was left as a single large “Work” partition. I wanted to reduce this in size to use as my Software volume, and as I mentioned earlier, also allow some space at the end of the drive for a later MorphOS partition. I have no plans right now to install MorphOS, but I can see that it’ll be something worth experimenting with, especially if the on-board graphics card gets driver support (currently, to use MorphOS on the X5000, you’ll need to replace the supplied graphics card). So, I reduced DH1 in size, leaving enough space to create some more partitions as needed:
I then also partitioned my new SSD and added a single large Work partition. A quick reboot and format of the drives later, and I was ready to start installing software, copying data over and customising the install!
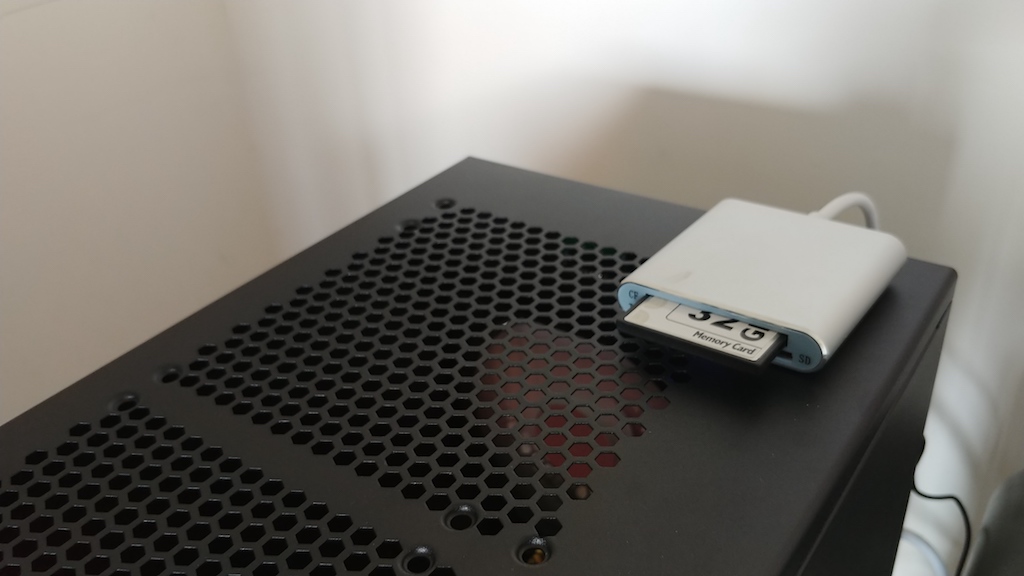
So now my next step was to transfer all the data over from my A1200. I removed the internal CF card from it, and placed it in an external USB adapter that supports CF, SD and micro-SD. The adpter is a “Cateck Aluminum Superspeed USB 3.0 Multi-in-1 3-Slot Card Reader”, which I purchased from Amazon here. It works very nicely in Linux, Windows, Mac OS and AmigaOS! Here’s the A1200s CF card inserted and ready for transfer:
I now faced another problem - I could mount the partitions using the “Mounter” utility after selecting the usbdisk.device device, but the A1200s partitions were labelled as DH0: to DH2:, which clashed with my internal drives. I found the documentation that said that I should alter the tooltypes of the Mounter utility to include NOUNMOUNT, which should have renamed the partitions and prevented the internal drives form unmounting:

However, no matter what I did, I couldn’t get this to work. So instead, I took a different approach - I simply opened the A1200s drive in Media Toolbox, and changed the A1200 partitions to become DH3: to DH5:. With this done, I could mount them without the internal drives unmounting, and could start to copy everything over. I first created a new directory and aliased this under my work partition to hold all my A1200 files:
makedir Work:A1200
Assign A1200: Work:A1200
makedir A1200:Drives
makedir A1200:Drives/System
makedir A1200:Drives/Software
makedir A1200:Drives/Work
And I also added the Assign command to my S:User-Startup for later use.
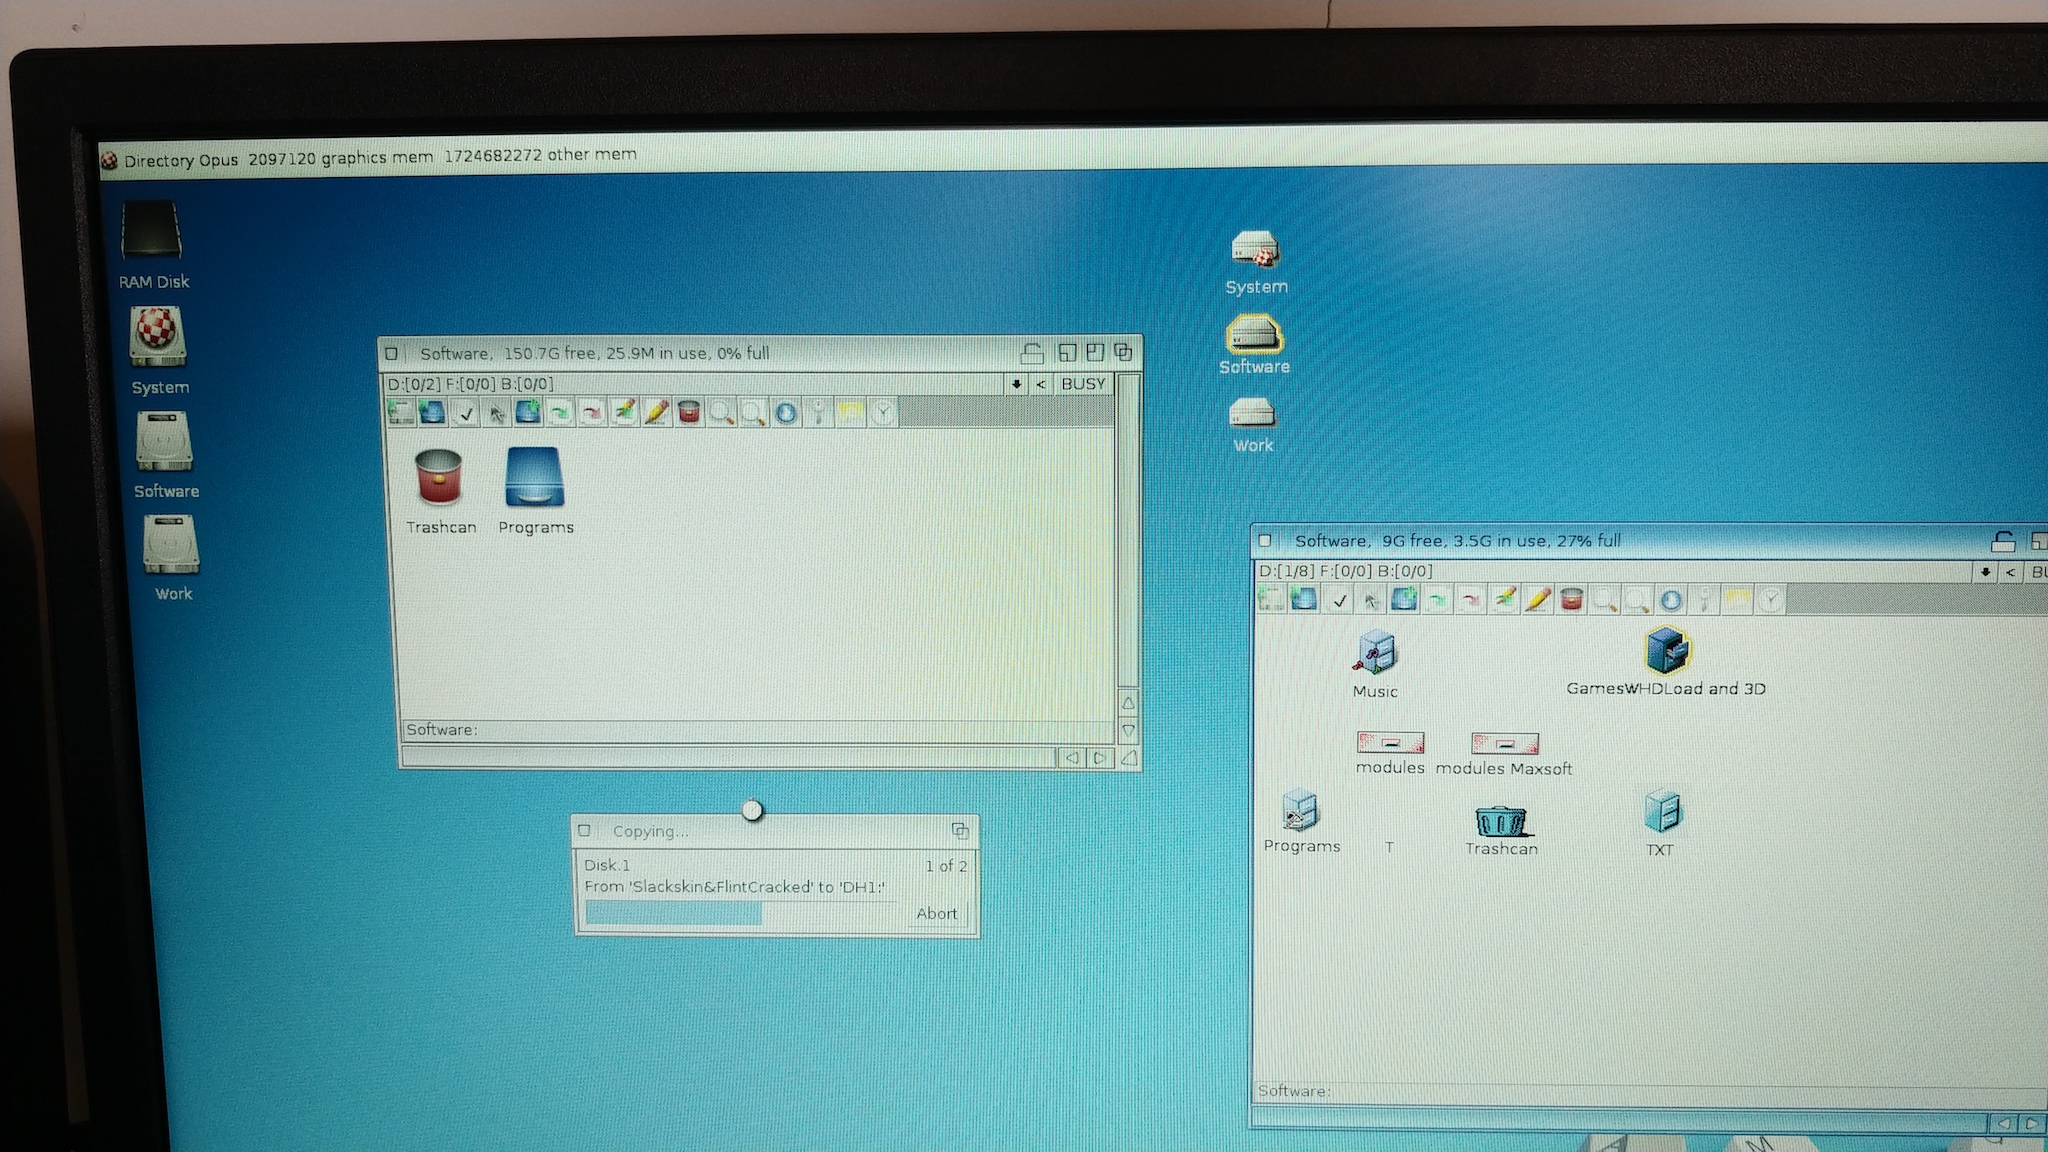
I started copying the files by using Directory Opus as you can see in this next screenshot, with the A1200 partitions showing up on the right hand side of the screen with their OS3.x icons:
Later on, I reverted back to a simple AmigaDOS shell session and did something like this for the remaining partitions:
copy DH4: A1200:Drives/Software all
copy DH5: A1200:Drives/Work all
After some more work customising my “classic” environment (details in a forthcoming post), here’s my desktop as it was at the end of my first day:

You can see I’ve tweaked it to my liking, added a classic Amiga wallpaper, setup X-Dock with a few useful shortcuts, and I also have my A1200 emulated in E-UAE, along with my old WHDload games ready for action. Setting up and tweaking my emulation configuration is definitely too much for this already very long post, so I’ll save those details for another time.
Until then, I hope this has been an interesting overview of my new system!