
Classic Amiga emulation on the X5000
Updated:
While I’ve been having a lot of fun with the new software written specifically for AmigaOS 4, the bulk of my software is still “classic” titles that used to run on my A1200. One of the first things I did when I set up my X5000 was to transfer my old Amiga’s hard drive over so I could continue running this library of software. I also wanted to set up an emulation of my A1200 so I can quickly launch a classic Workbench 3.9 session and pick up all my old projects and bits of code I’d written over the years.
Fortunately, the X5000 and AmigaOS 4 offers a variety of ways of running all your old software. For this blog post, I’ll break it down into four areas:
- Running software from disk images (such as ADF, DMS etc.)
- Running games and demos from WHDLoad
- Full system emulation with E-UAE
- Running 68k system software
Disk images
The first “mode” I wanted to explore was running classic Amiga games and demos from ADF disk images.
I discovered that thanks to the pre-installed RunInUAE tool, this was about as easy as it gets - you simply double-click a supported disk image filetype such as an ADF or DMS image, and RunInUAE then boots a pre-configured fullscreen classic Amiga environment with your disks attached.
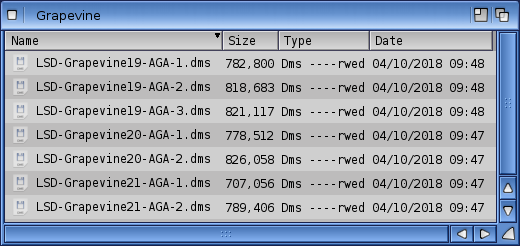
It relies on the filename to select the model of classic Amiga to emulate so if your disk image has the letters AGA in the filename, then an A1200 will be emulated. Otherwise, it falls back to a classic A500 setup. It also supports multi-disk demos and games very simply: If the filenames for your disk images are identical apart from a trailing numerical character, it will “insert” both disks into the system. As an example, here’s what my directory of classic “Grapevine” disk magazines looks like after I’d renamed them according to RunInUAE’s standards:
By default, the emulation runs in fullscreen mode. You can quit the emulation by holding down Ctrl and pressing the Alt and q keys, and Ctrl-Alt-s switches out of fullscreen mode. You can also tweak the settings for an individual game by dropping it onto the RunInUAE window and right-clicking to see a menu where you can change the input devices (joysticks etc.), screenmode and other things. This creates a customised .uaerc file for that particular image which you can see opened in Multiview below:

Here, I’ve switched to windowed mode instead of full-screen. You can also see in the generated .uaerc that it provides a Workbench volume providing a 3.1 installation mounted on a virtual DH0:. This installation lives under System:Emulation/AmigaDisks/Workbench3.1 - this will be important later on… In addition, my usual volumes (Software, Work and System) are also mounted into the virtual Amiga in read-only mode.
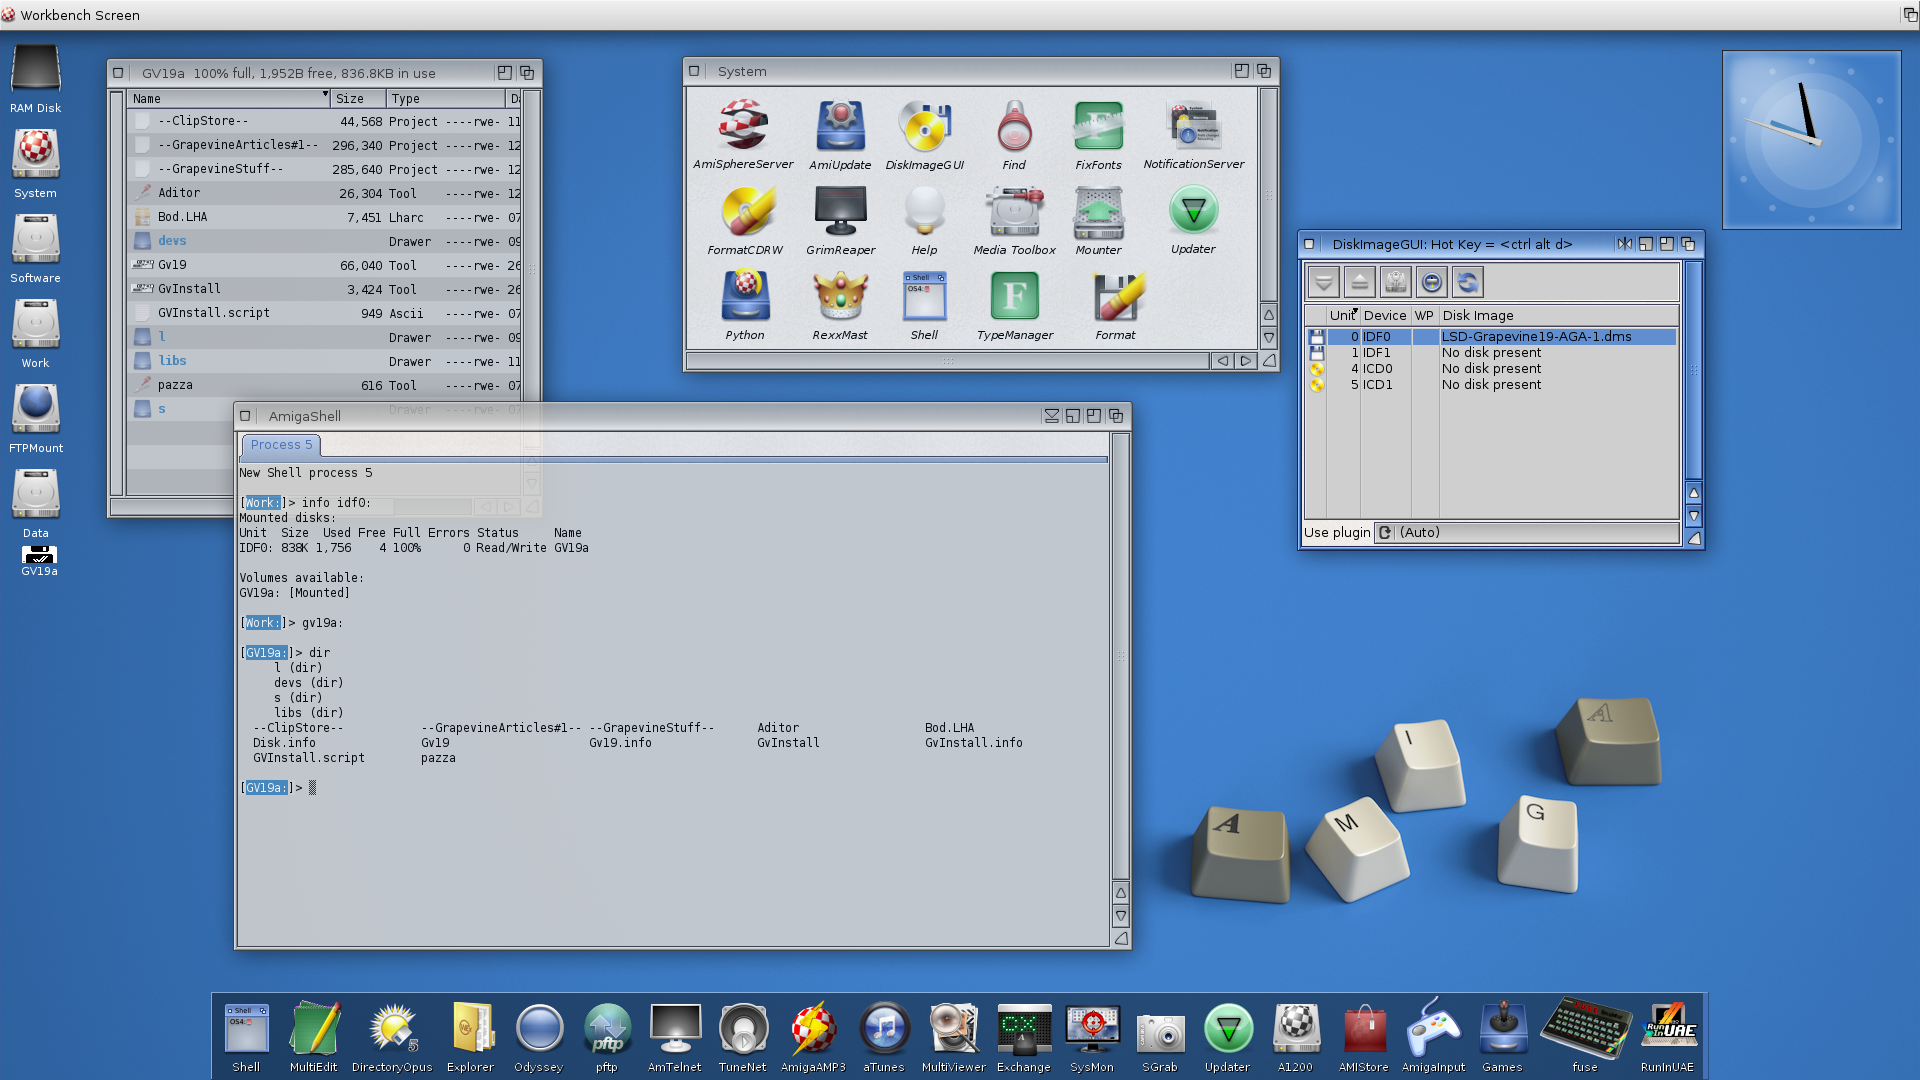
A nice touch is that the DiskImageGUI utility also supports Amiga disk images, so you can also mount the images as virtual IDFn: volumes. As an example, I’ve mounted the Grapevine disk image with Mounter and you can see it show up on my X5000 desktop, accessible just like a real floppy image:
The DiskImageGUI runs as a commodity after you close the window, so you can always bring it back with the shortcut Ctrl-Alt-d.
WHDload
WHDLoad is an awesome tool developed for classic 68k Amigas that makes lots of games and demos runnable straight from a hard drive, even for programs that didn’t natively support a HD install option. There are lots of archives available on the Internet of thousands of classic games and demos, all pre-configured and ready to go. These can also run on the X5000 and AmigaOS 4 through RunInUAE, as it provides a WHDLoad “shim” which boots an emulated Amiga and runs the real WHDLoad from inside that.
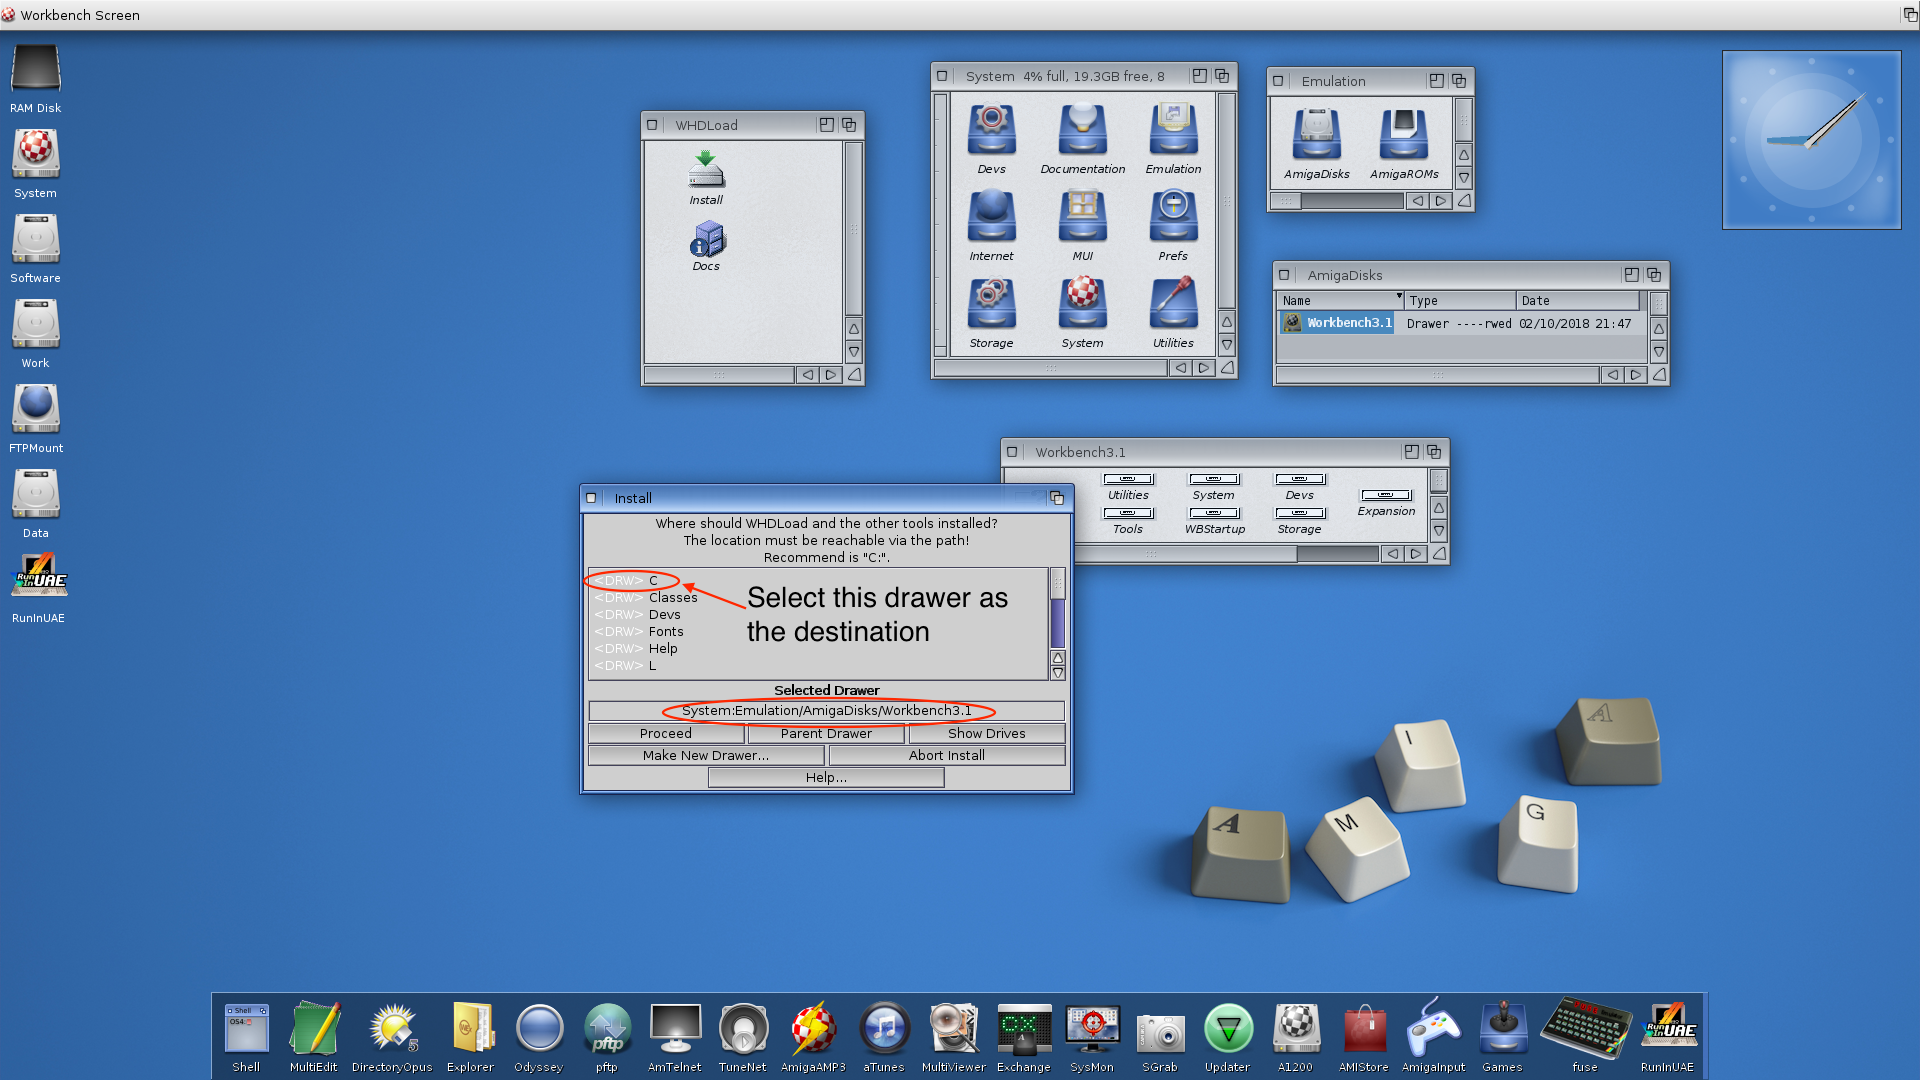
However, the bundled WHDLoad binary is pretty old, and is also unregistered so before a game starts you are presented with a “please register” message and a timer that counts down before the game will actually start. Newer versions of WHDLoad include numerous improvements and also remove the registration requirement, so the first thing I did was update the installation. I went to the WHDLoad homepage and downloaded the latest “usr” package which was a standard LHA archive. After extracting it, I ran through the installer utility, but (and this is important!) I selected the C directory under System:Emulation/AmigaDisks/Workbench3.1 as the destination. Do not install this into your AmigaOS 4 System volume, as otherwise it’ll overwrite the WHDLoad “shim”. You can see the correct path specified in the screenshot below:
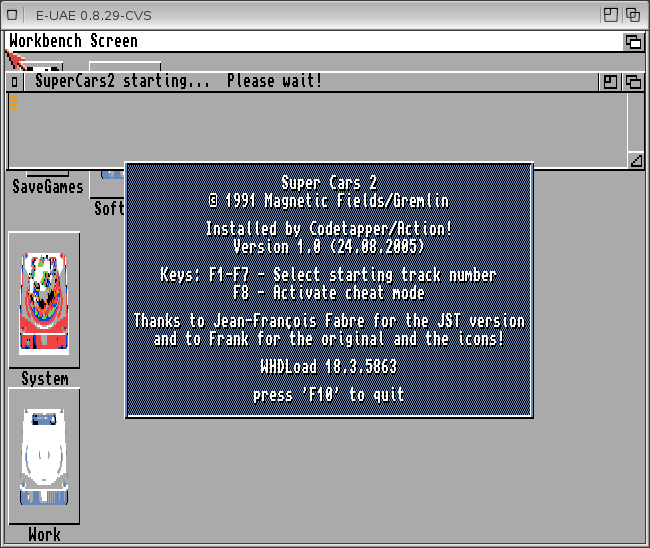
Once this was done, all my WHDLoad games and demos worked exactly as they did on my A1200! Here’s what the emulation screen displays briefly before the game starts, showing the updated WHDLoad install:
Joystick tweaks
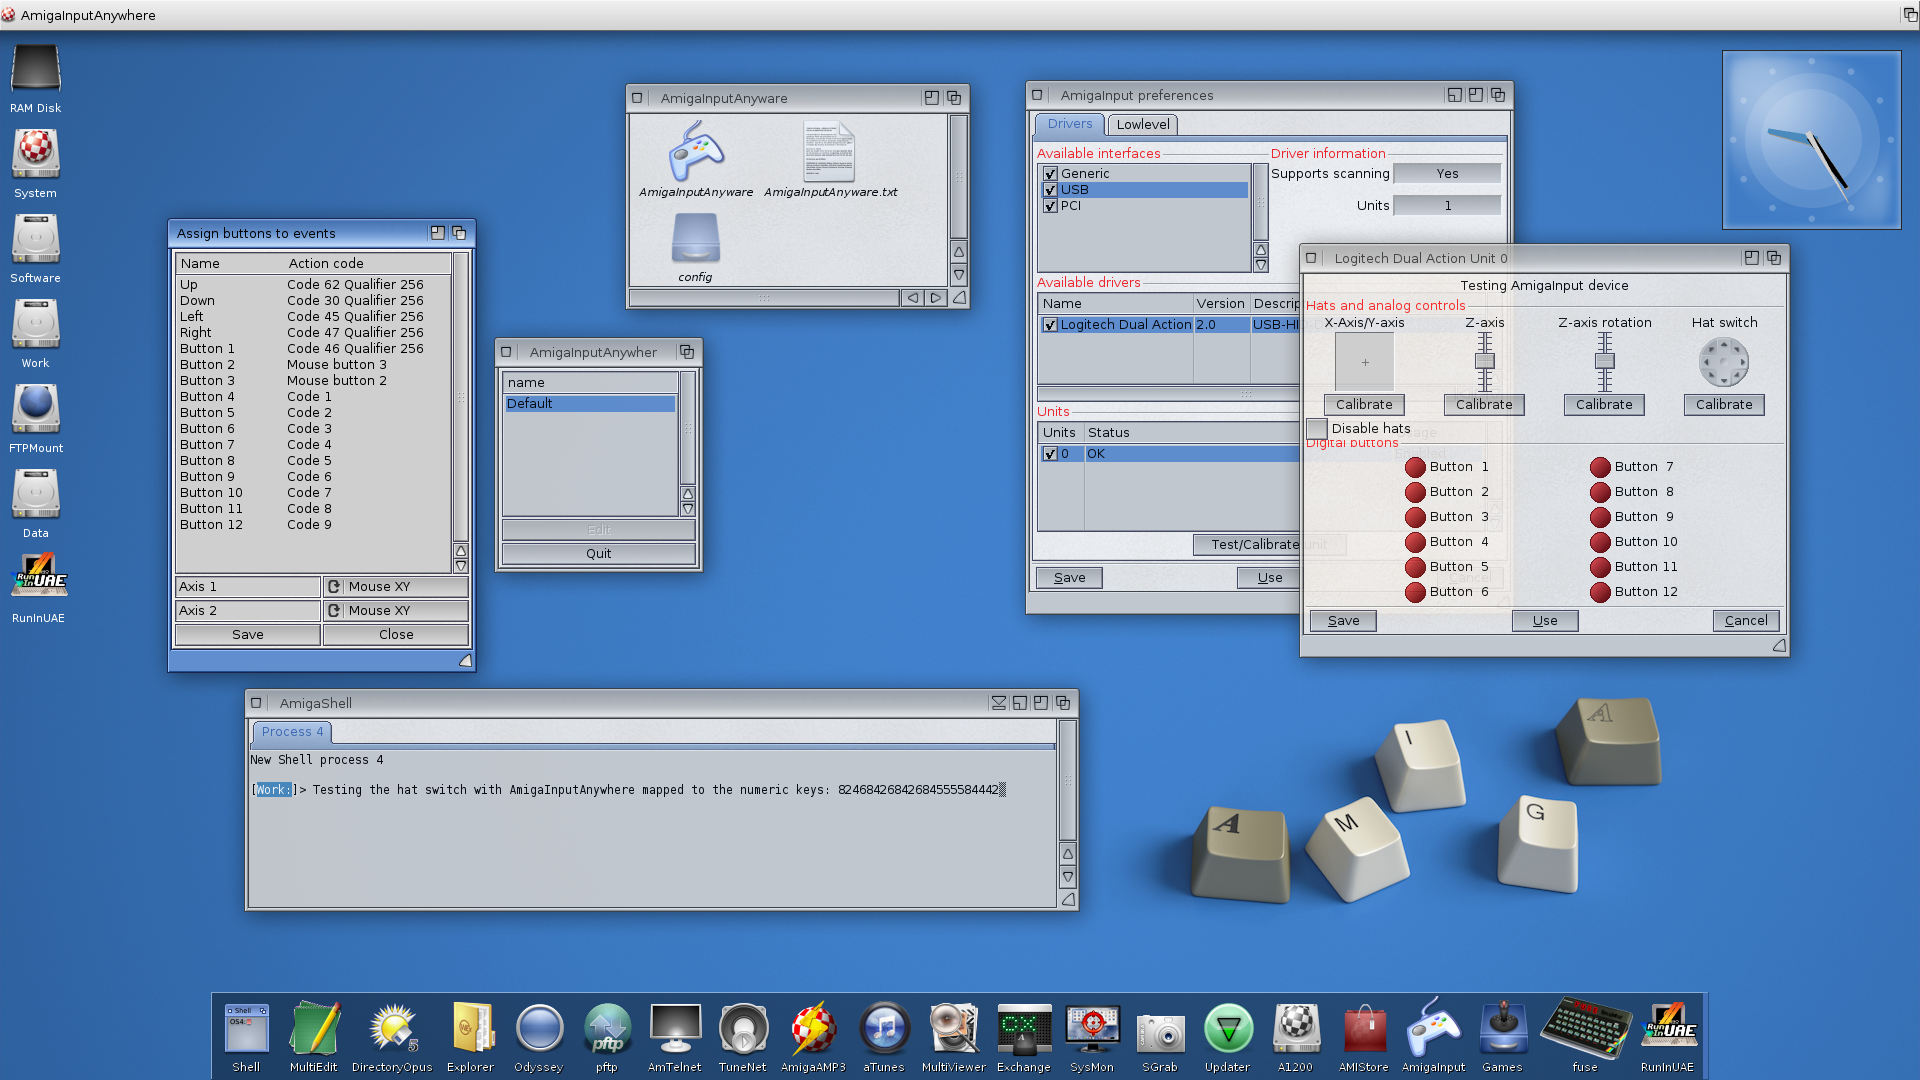
The only AmigaInput supported gamepad I have for my X5000 doesn’t let me use the “hat” switchpad in most games. For some things this is fine, but for other games I prefer the feel of the classic pad instead of using the joystick nubs. I found a fantastic tool on http://os4depot.net/ called AmigaInputAnywhere which lets you use an AmigaInput device to trigger keypresses or other actions. With this, I could set my gamepad’s “hat” controller to trigger the numeric keys (8=Up, 2=Down, 4=Left, 6=Right, 5=Fire) which can then be selected as an emulated Joystick in RunInUAE. For the games where I preferred the Hat switch, I just opened up RunInUAE and dropped the game icons on the open window, right clicked and selected Per-game settings -> Set joystick to -> kbd1 (number pad). In the next screenshot, you can see the AmigaInput prefs open, along with my AmigaInputAnywhere configuration and a test session in the shell where moving the hat switchpad generated a stream of number-pad keypresses:
Full system emulation
Although I could now run my old games and demos through RunInUAE, I also wanted to emulate my A1200 as a “full system” which boots into my Workbench 3.9 installation so I can continue with my old projects. I had the directories prepared with the contents of my A1200’s hard disk copied over; this was covered in my earlier blog post here.
To setup this emulation environment, I decided to use an updated E-UAE which has been released on OS4Depot here. This version of E-UAE has JIT support which can add a significant speed boost, although it’s worth experimenting with it as some things can become unstable when enabling it. I also definitely didn’t want to interfere with my stock E-UAE installation. Even though it’s old, it still seems to work fine for my disk images and WHDLoad games, so instead I unpacked this updated release into a seperate directory at Software:Programs/E-UAE_1.0.0.
I then created the Configuration file at Software:Programs/E-UAE_1.0.0/.uaerc based on a template from Amigaone X5000 Blog. I made a few simple changes: Disabled the floppy drive sound, enabled the JIT (after some experimentation, my installation seemed to run better with it) and changed the paths to my emulated hard drives and ROM image. For reference, my slightly modified .uaerc file is listed below:
kickstart_rom_file=A1200:rom/amiga-os-310-a1200.rom
kickstart_key_file=A1200:rom/rom.key

amiga.floppy_path=A1200:Floppies

floppy_speed=400
floppy0sound=0
scsi=true
scsi_device=true
show_leds=false
filesystem2=rw,DH0:System:A1200:Drives/System,1
filesystem2=rw,DH1:Software:A1200:Drives/Software,0
filesystem2=rw,DH2:Work:A1200:Drives/Work,0

joyport0=mouse
joyport1=joy0

cpu_type=68040
cpu_compatible=false
cpu_cycle_exact=false
cpu_speed=max

chipset=aga
immediate_blits=yes
collision_level=full

chipmem_size=16
bogomem_size=0

fastmem_size=0
z3mem_size=256
gfxcard_size=32

sound_output=exact
sound_channels=mixed
sound_frequency=44100
sound_latency=120
sound_max_buff=8192

amiga.screen_type=ask
amiga.publicscreen=ask
gfx_fullscreen_amiga=false

amiga.use_dither=false
gfx_framerate=1

# Display settings
gfx_width=1024
gfx_height=768
gfx_width_windowed=720
gfx_height_windowed=568
gfx_fullscreen_amiga=no
gfx_fullscreen_picasso=yes
gfx_lores=false
gfx_linemode=double
gfx_correct_aspect=no
gfx_center_horizontal=smart
gfx_center_vertical=smart

# Miscellaneous
use_debugger=no
ppc.use_tbc=false

# JIT
cachesize=8192
cpu_compatible=false
cpu_cycle_exact=false
blitter_cycle_exact=false
comp_constjump=yes
comp_trustbyte=indirect
comp_trustword=indirect
comp_trustlong=indirect
comp_optimize=true
I created a little script file to launch the emulation environment, this was a simple text file with the following lines:
cd Software:Programs/E-UAE_1.0.0
uae
I saved this as “a1200” in my Work:c directory I keep for my own scripts and tools (this is also added to my path in my S:User-Startup). I also ran Protect Work:c/a1200 +s to mark it as an executable script. So that I could also launch this from X-Dock, I copied over a nice .info icon file to this directory and renamed it as a1200.info. I then modified the tooltypes as per the screenshot below:
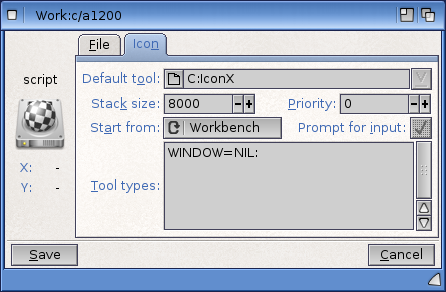
This sets the default tool to C:IconX which launches script files, and also set the window to the NIL: device so I didn’t get a screen of UAE debugging output.
With that in place, all I have to do now is click on the icon in my X-Dock, and I get a windowed emulation of my A1200 just as I’d left it!
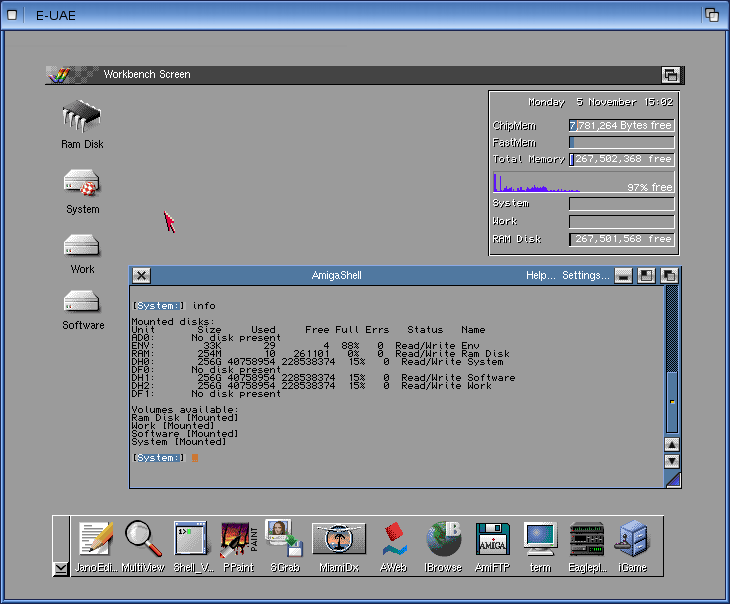
I can easily put this into fullscreen mode by using the Ctrl-Alt-s shortcut, and I also discovered that Ctrl-Alt-g “grabs” the mouse pointer inside the emulation which is really useful when it’s running in windowed mode.
Classic 68k binaries
AmigaOS 4 also includes a built-in JIT 68k emulation layer called “Petunia” that allows classic system-legal 68k binaries and libraries to run unmodified. For these to run, they must only use OS system calls and avoid “hitting the hardware” - so anything that bangs on the custom chipset can’t be used (although there’s always RunInUAE for such things).
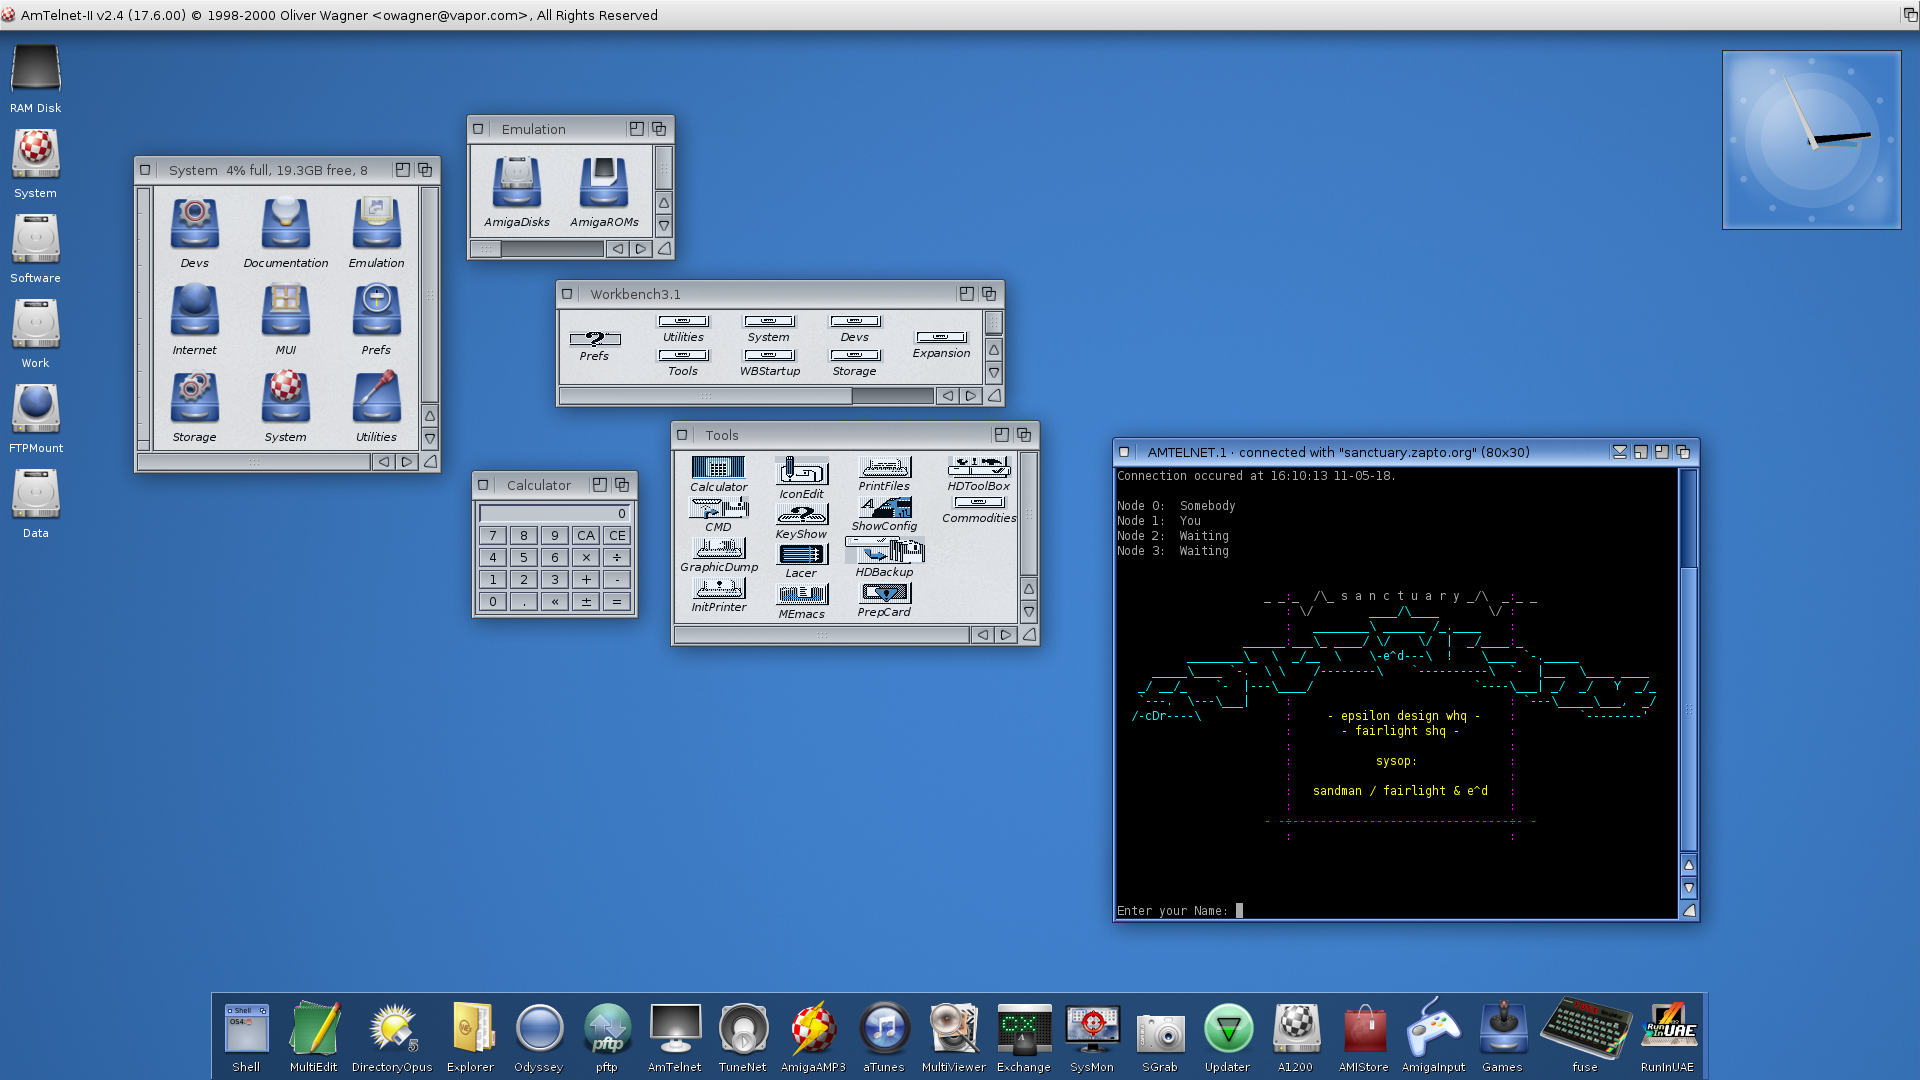
Many tools and utilities work just fine however, especially more recent 68k binaries. In the screenshot below, I’m running the 68k binaries of the Workbench 3.1 “calculator” tool, and also AmTelnet for some classic BBS action. AmTelnet is a particularly good example of what can run: It’s a full MUI program which also installs some custom 68k libraries. Apart from the occasional Grim Reaper crash on launch, it functions just like a PPC-native program. It’s fully integrated into the updated Workbench environment, and if I never looked at the task listing in SysMon and saw the “68k” field in the “Arch” column, I’d have thought it was a native application!
So there you have it! I hope that’s been of some help and interest :) I’ll continue to update this blog with more of my Amiga experiments, and feel free to leave a comment with any questions!