
DevOps for the Sinclair Spectrum - Part 1
Updated:
This article is part of a series
- Table Of Contents - Full table of contents in Part 1
- Part 1 - Introduction, hardware, development environment, Windows/Linux buildchain and tools
- Part 2 - The server environment and building the first prototype
- Part 3 - The backend server daemon, pipelines and unit tests
- Part 4 - Wrap-up, other sites and final thoughts
Discussion on Hacker News Discussion on lobste.rs
NOTE : You can now access the TNFS site through an emulated ZX Spectrum running in a web browser at jsspeccy.markround.com!
Intro

The enterprise grew into a curious mix of old and new: Container-based pipelines with Ruby server-side components, all interacting with Spectrum BASIC and z80 assembly code, running on real 1980s hardware with a TCP/IP connection. If you’ve ever wondered how to unit-test Sinclair BASIC programs in GitOps pipelines running on Kubernetes clusters, this is the set of articles for you ;)
The site has already attracted a community of users and even got featured on The Spectrum Show #107!
The above video is a great overview of using an older version of the site as well as some of the hardware details, skip to around 3:33 in to see it in action.
This series of articles covers the technical details and “behind the scenes” processes of building a Spectrum platform/application using modern toolsets. As this is one of the longest things I’ve written, I’ve split it into multiple posts and included a Table Of Contents below so you can jump between sections. There’s also a set of permalinks at the top of each article linking to the other parts to make navigation easier.
Table Of Contents
The hardware

The floppy drive had been replaced with a Gotek drive that emulates floppies through .DSK files saved on a FAT-formatted USB stick. This provided a way to get code and software into the machine without having to load from cassette tape: I could download DSK games from the internet, or create my own code in an emulator and then transfer things over via “sneakernet”.
Development
As much as I wanted to sit at the speccy and write code directly on it, I found the experience just too frustrating. For one thing, my typing over the years has got way faster than my young “pecking slowly at the keys” tempo and I found the poor old computer just couldn’t keep up. I was getting constant missed letters along with that infurating syntax error “BOOP” noise. I also found it very hard to adapt to the odd keyboard layout again and found myself accidentally mashing the GRAPH or EDIT keys way too often.
While I could have adapted my typing habits, a more pressing matter was the fact that the Spectranet card I later added (see below!) forces the Spectrum into 48k mode. This meant any programming had to be done using the horribly convoluted keyword entry system that was one of the original Spectrum’s “lovable” quirks. And by “loveable”, I mean “rage inducing”. The 48K model keyboard looked like this:
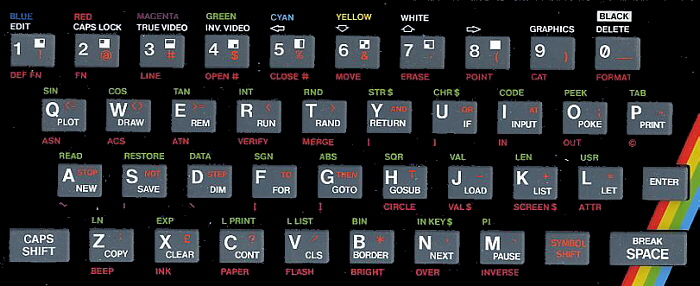
You’ll notice that the keys have lots of BASIC keywords printed on them in different colours. This was a laughable attempt to make BASIC entry on the squishy rubber “dead flesh” keyboard faster - what it means in practice is that when in Keyword mode, you press e.g. the J key and the LOAD keyword appears. To get the red characters, you hold down SYMBOL SHIFT, so most kids quickly learned the J-SYMBOL SHIFT-P-P combo to enter LOAD "" to load games from tape.

SYMBOL SHIFT and CAPS SHIFT; sometimes together, sometimes one after the other. All guaranteed to bring on more frantic beeping than a newbie trying to exit vi as you get the combinations wrong; the Red Mist descending, followed closely by crippling wrist pain in a few minutes flat.
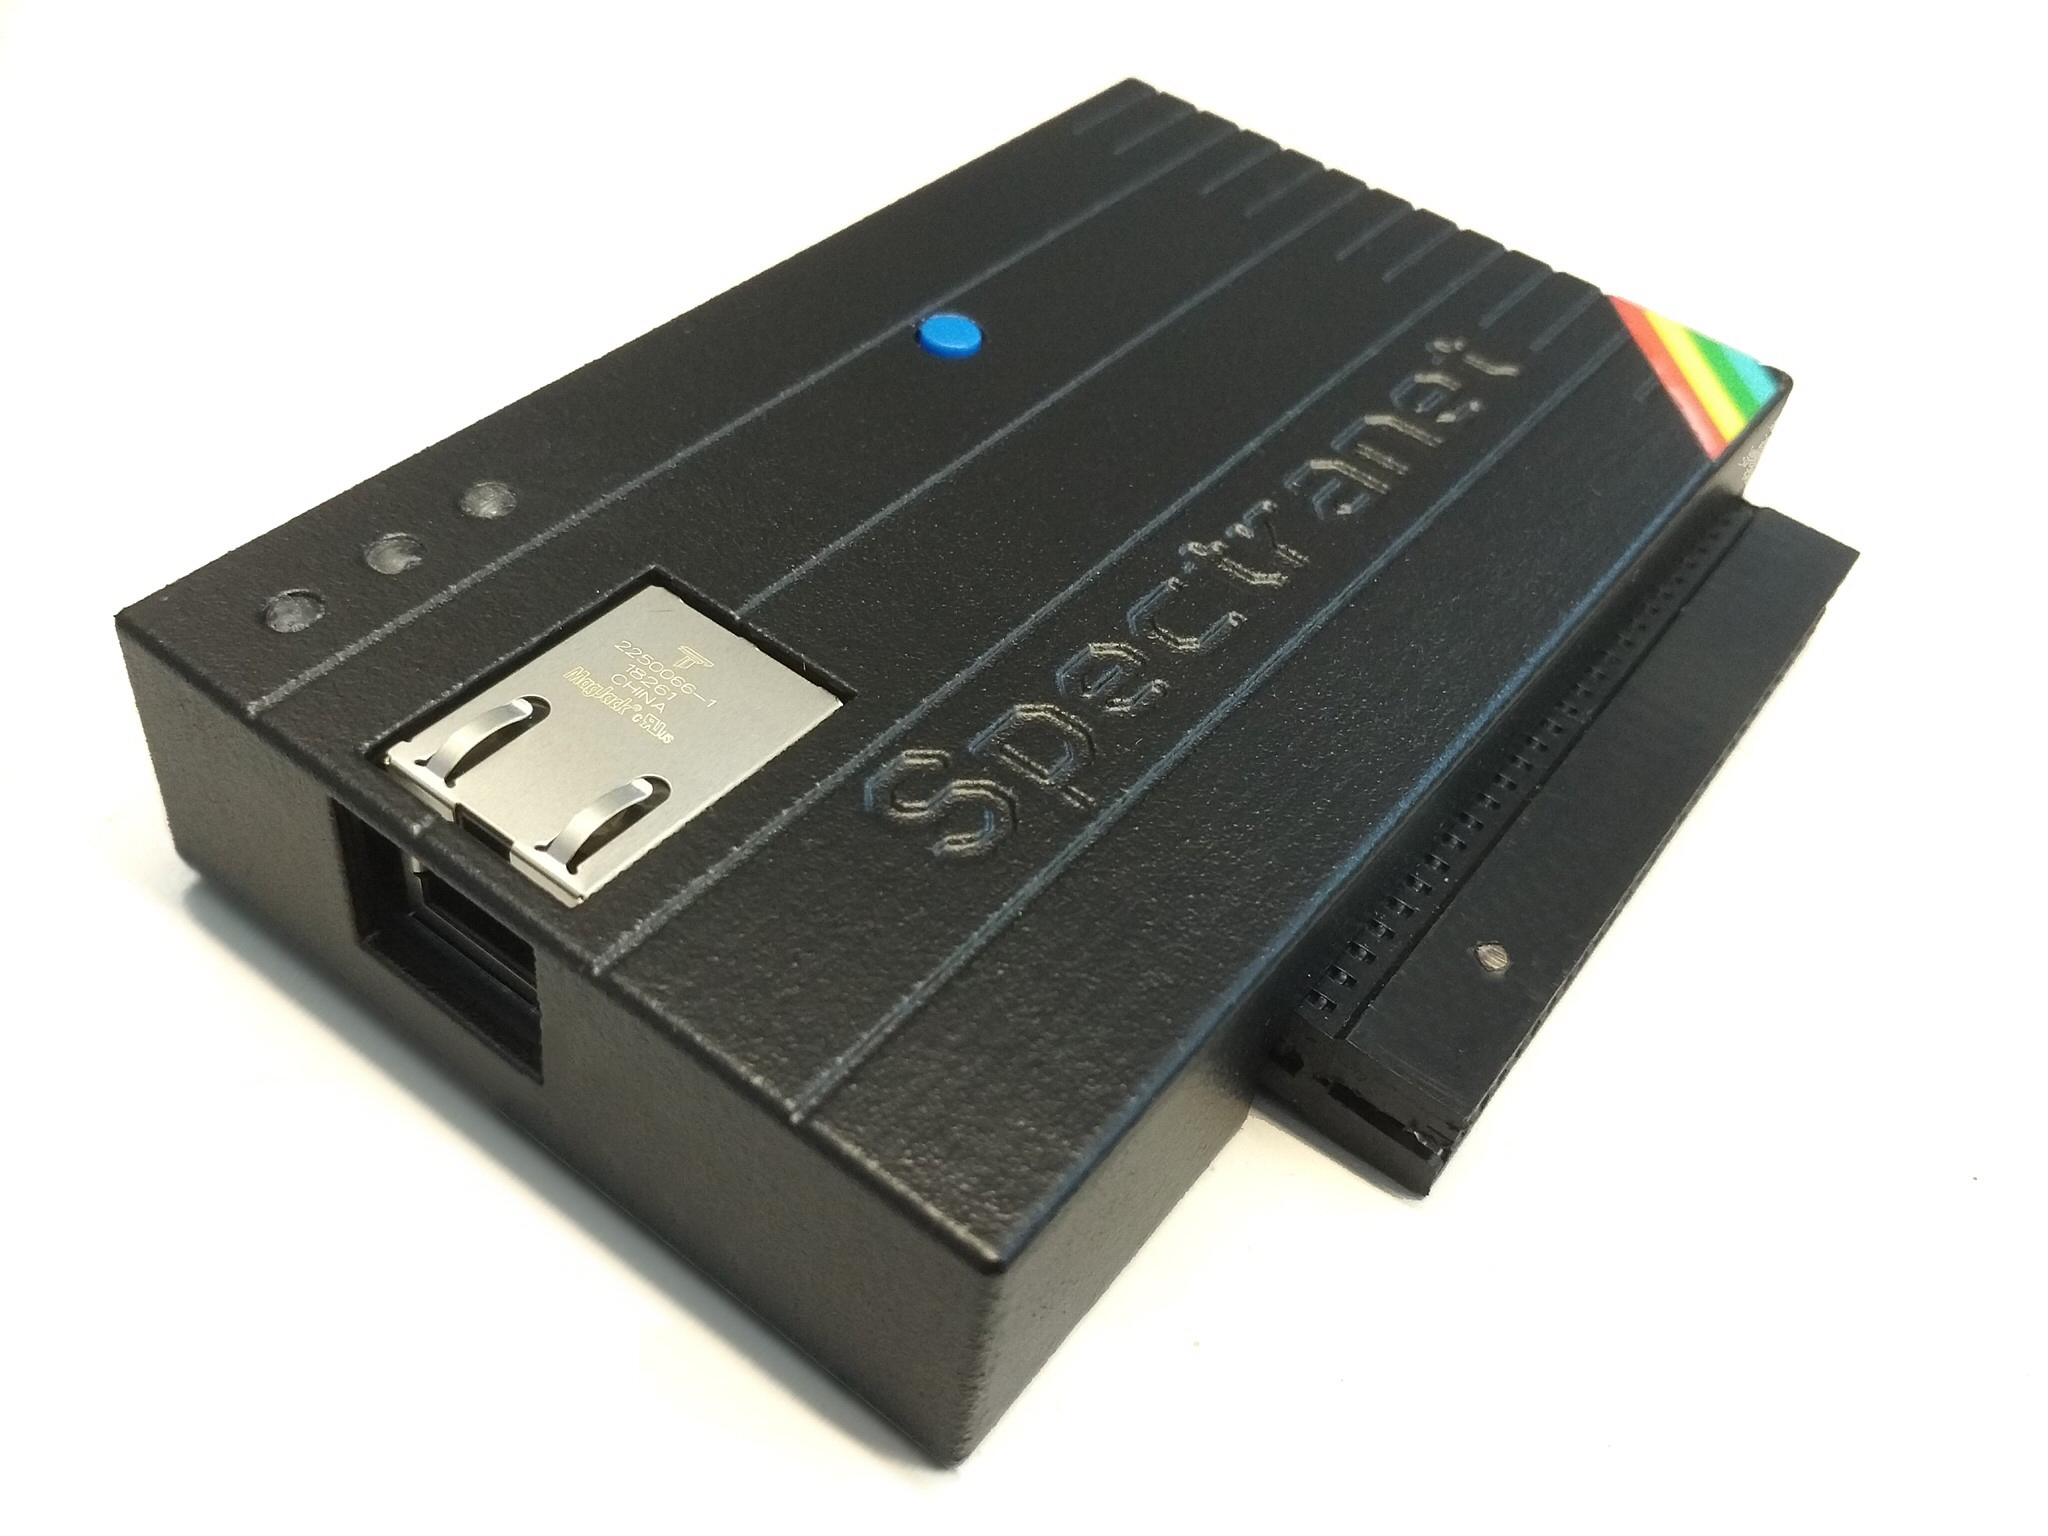
Spectranet
So now I had to work out a way of getting code written on my laptop into the Spectrum. There’s no end of development options and workflows when using an emulator, but I wanted to get my code over to the Speccy with the minimum of fuss for testing on the real hardware. My first thought was to find a way of producing .TAP or .TZX files, writing them to a SD card and then plugging them into an interface such as a DivMMC. An alternative route might also have been to use the Gotek drive fitted in my +3, and transfer .DSK disk image files over via a USB stick. But that’s a lot of fiddling around and trotting forwards and backwards between machines.
For example, you can use %cat to catalogue the files in a filesystem (like ls or dir) and %tapein loads a .TAP image as a virtual cassette tape. Other commands are provided which allow you to load code or snapshots directly into the Spectrum’s memory as well as interact with TCP services from BASIC. As mentioned above, there’s a great review of the card and functions on The Spectrum Show YouTube channel.
To my mind, this is perhaps the most elegant solution for developing Spectrum software on a PC: You can build and develop locally, test in an emulator (even including Spectranet emulation) and easily deploy to a server and run on the real hardware in seconds. Best of all, if you save your code as a .TAP-format file named boot.zx in the root of your TNFS server, you can load and run it automatically when you turn your Spectrum on via an autoboot function.
Note as of end of December 2021: Spectranet cards are quite hard to come by now, but you can still find some clones on eBay (e.g. “ShamaZX NET”). You can always use emulation though in the meantime. UPDATE 16th February 2022: ByteDelight just announced on their Facebook group that they have ordered another batch of cards! Keep checking out their website for any updates.
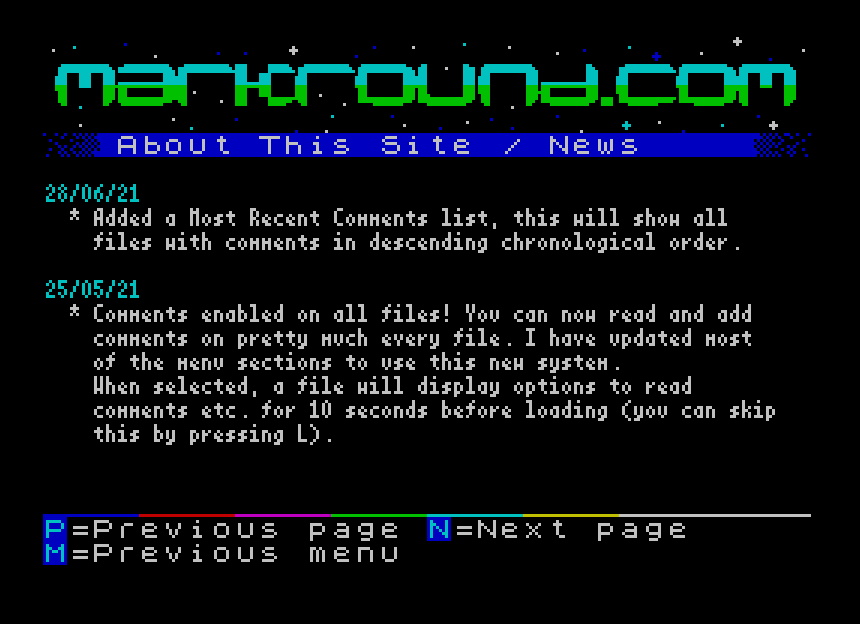
There are a few public TNFS sites on the Internet where people have taken this idea and run with it; it’s kind of like a website or BBS system for Spectrums; the main difference being that the code is downloaded and run directly on your machine instead of being accessed via a terminal emulator or browser. I also review and provide screenshots for my favourite sites in Part 4.
This is where the idea occured to me: My BASIC skills may be old and rusty, and I never progressed much beyond rudimentary Z80 assembly language - but I was pretty sure I could build a pretty nice TNFS site. I’d always wanted to run a BBS back when I first had my Amiga (and the ‘Scene’ was all the rage), so this seemed like an ideal fun project that would serve as a great re-introduction to Spectrum coding, and give something back to the community that had influenced me so much when I was growing up. To work!
Windows/Linux Buildchain
My current development environment of choice is Windows 11/WSL2/VScode/Docker. I’ve been through both Mac and Linux (since 2000 - I do not miss having to recompile my kernel for sound card support…) on the desktop, and this is just what gives me minimal grief at the moment. That’s not to say I’m overly fond of it, but things tend to “just work”. You can see an example screenshot of a typical development session below:
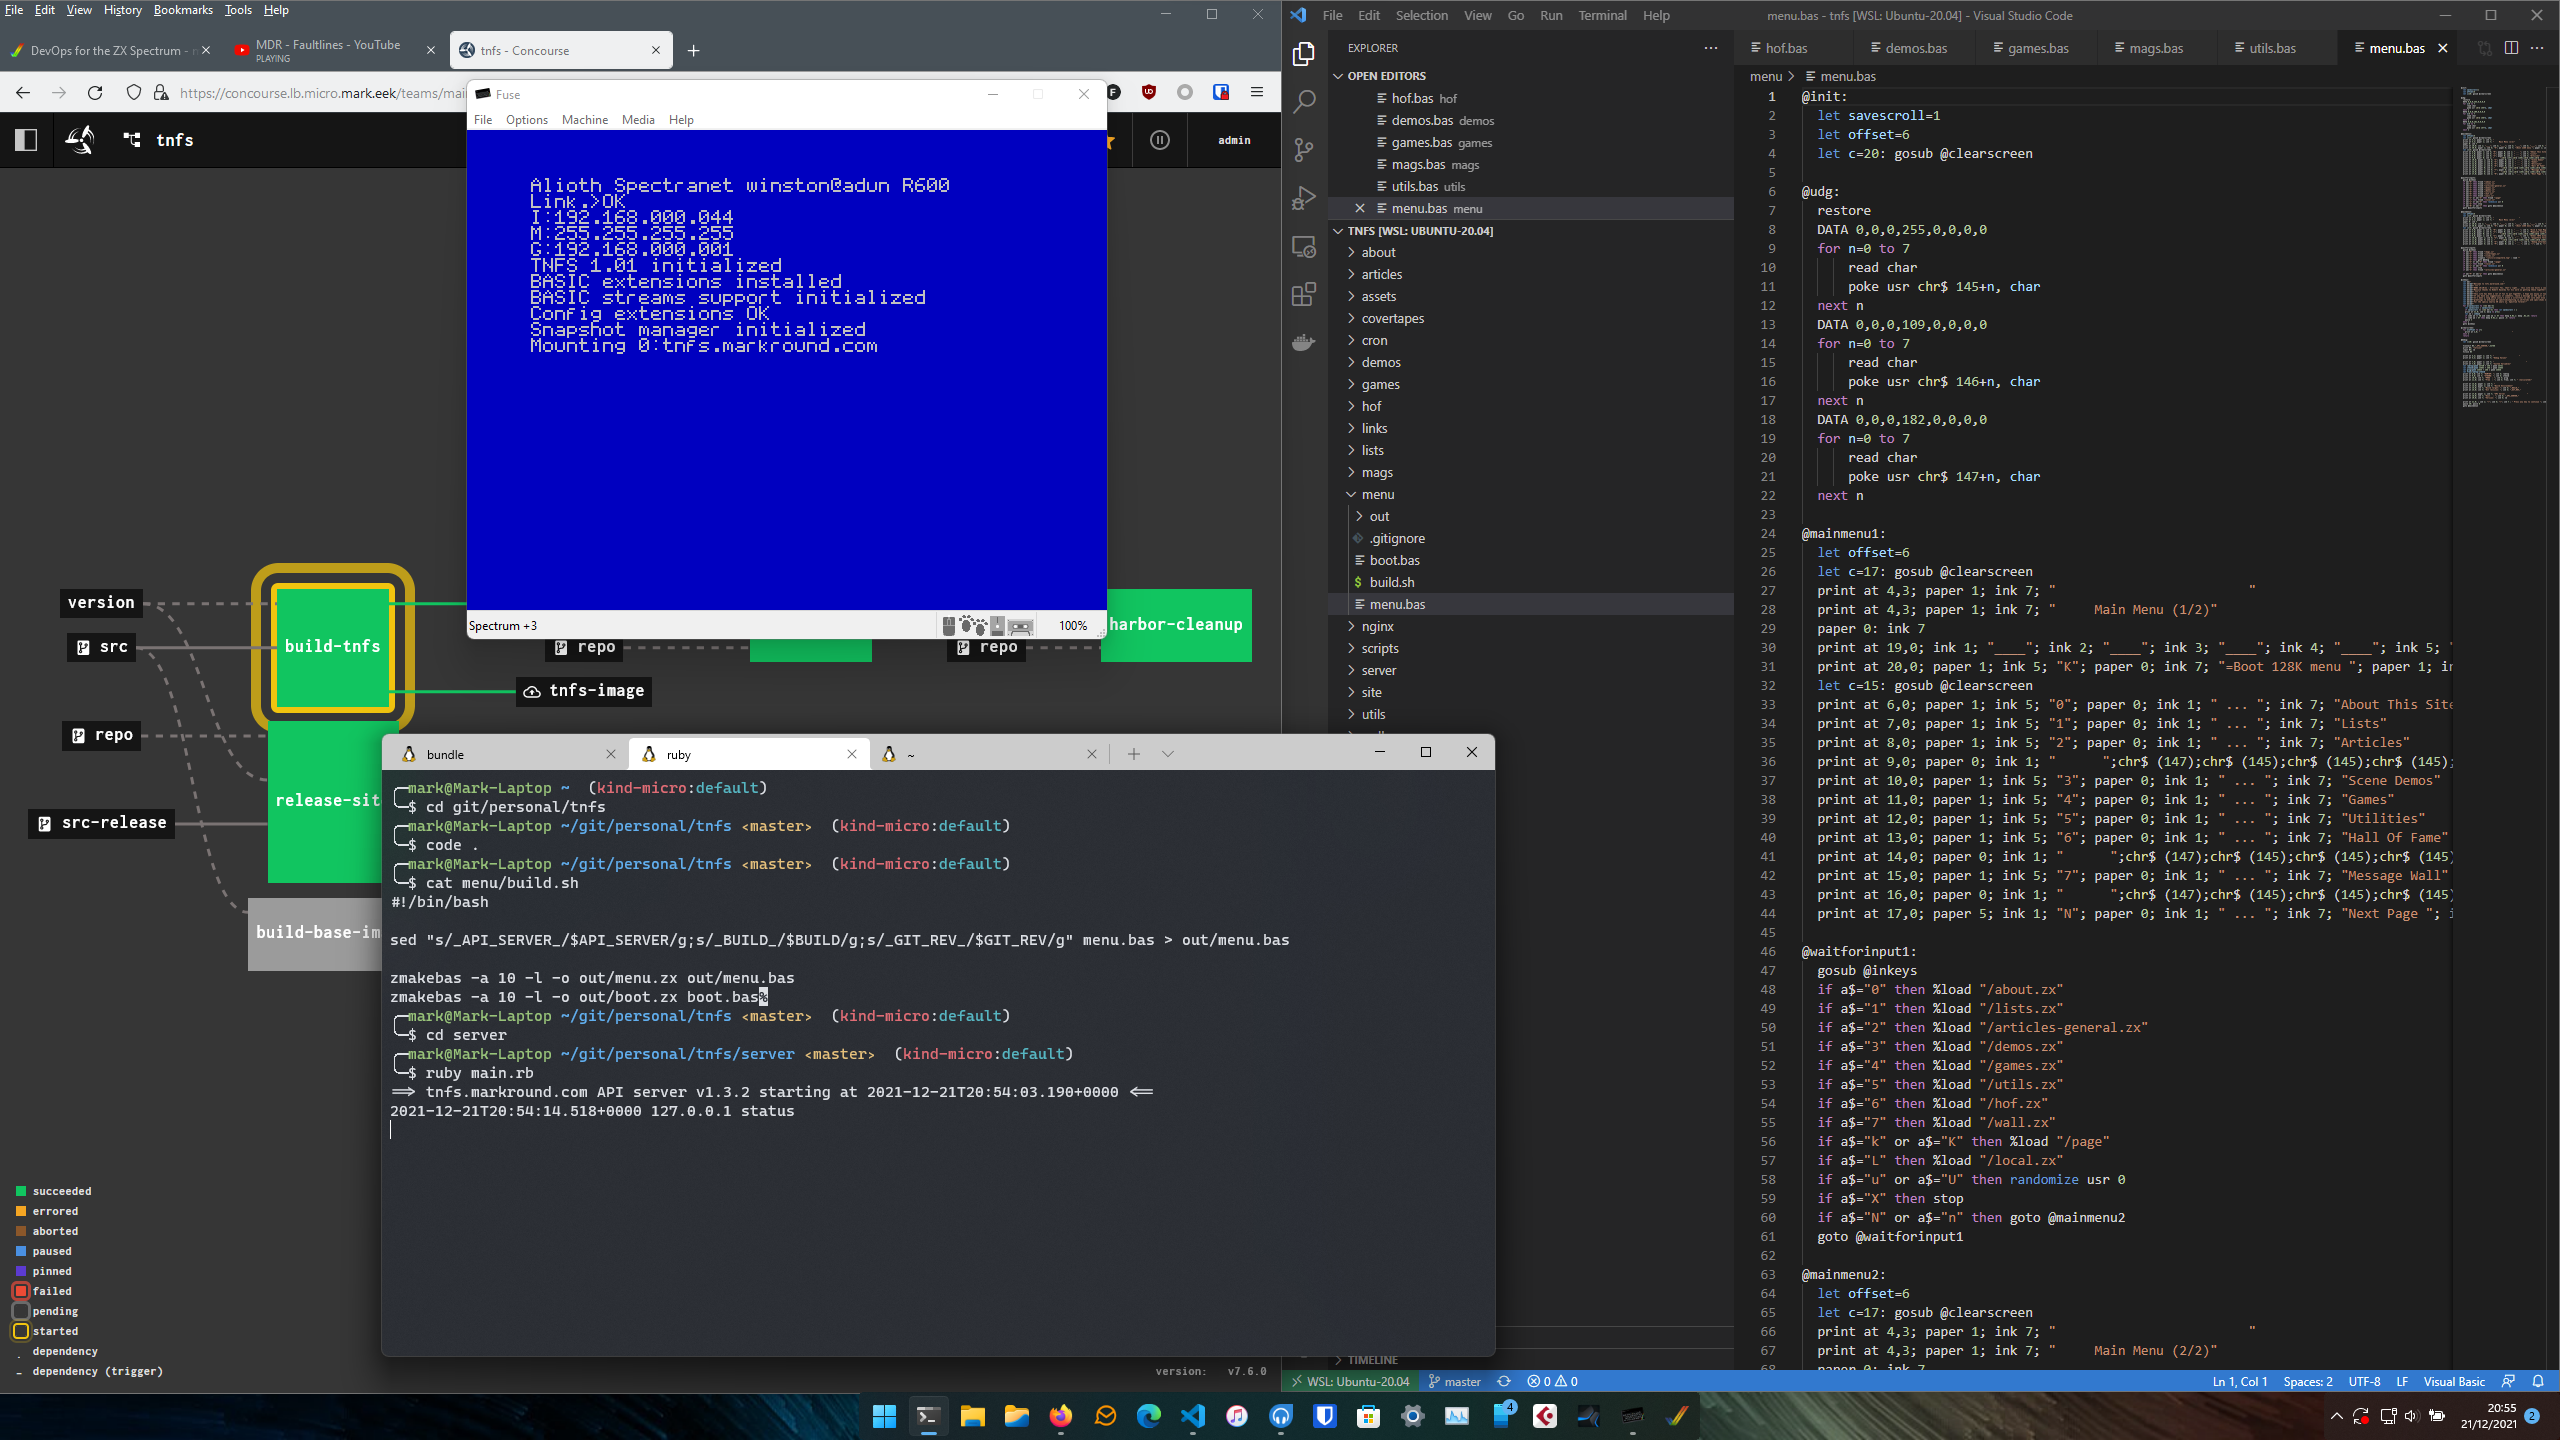
Using WSL and Docker means I’m free to easily bounce between my laptop and Linux/Kubernetes-based servers and keep things consistent. As I wanted to eventually automate everything (notice the Concourse pipelines running in the background - I’ll cover all that in later parts), I went looking for something that could be run in a container that could compile my code alongside the rest of the infrastructure pipelines.
Emulators
Since the Spectrum has been around for such a long time, there’s no shortage of emulators available, covering pretty much every platform from old DOS-based things to modern mobile operating systems. My current preferred emulator is the venerable Free Unix Spectrum Emulator FUSE, which despite the name, has been ported to Windows, MacOS, and even Haiku and AmigaOS. Apart from the benefit of being available on all of my systems, it’s also one of the more complete emulators out there and can simulate a very complete and wide-ranging set of Spectrum models/clones and additional expansion cards including the Spectranet. You can see it displaying the blue & white TNFS pre-boot sequence in the screenshot above.
Like the other tools I used, this could also be run from within a container, using Xvfb to provide a pseudo graphical environment. I’ll talk about that a bit more in Part 3, though as I came up with one of my favourite hacks with it!
Compilers
As I’d be writing my code in VSCode, I needed something that could turn my BASIC and Assembler programs into a format that the Spectrum could load. Fortunately, there’s quite a few such projects and I ended up settling on the Pasmo cross-assembler and zmakebas for my BASIC code. Both of which output files in .TAP format which can be loaded into an emulator or renamed to .ZX and dropped into a TNFS share for loading into a real Spectrum.
Pasmo
I’m only slowly starting to dip back into low-level coding again, but there’s a few useful pre-written Z80 assembly routines I’ve used in my site such as the handy 64-column text driver used in the articles and other sections to work around the somewhat limited and chunky 32-column character set used by default on the Speccy. But more on that later…
Pasmo is included in many Linux distributions, including Debian and Ubuntu, which I tend to use for all my projects and as Docker base images. It’s therefore a quick apt-get away and from there it’s simple to compile your code to a TAP format binary which can be used by emulators such as Fuse or loaded directly into Spectranet systems:
$ pasmo --tap 64.asm 64.tapzmakebas
There’s a bunch of tools available to turn plain text Sinclair BASIC listings into executable formats for emulators and real hardware alike. I started off using txt2bas, but this had a number of drawbacks for my way of working. I settled on the awesome zmakebas at a suggestion of a user on the Spectrum Computing Forums. One of the key advantages this tool had was it was written in portable C so I could use it on all my systems. It also supports using indentation and labels instead of line-numbers in Sinclair BASIC. This is another massive improvement which as far as I’m concerned is a must-have for bringing things into a vaguely more modern era.
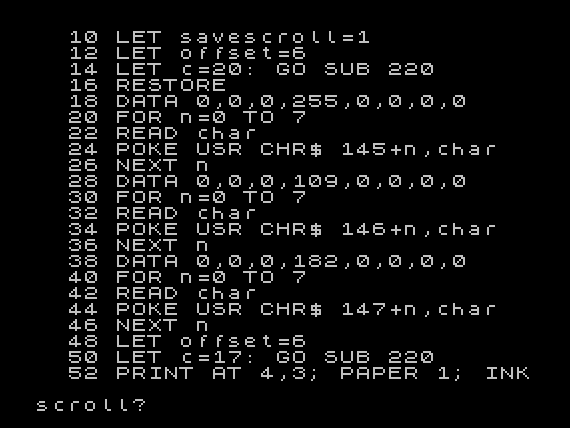
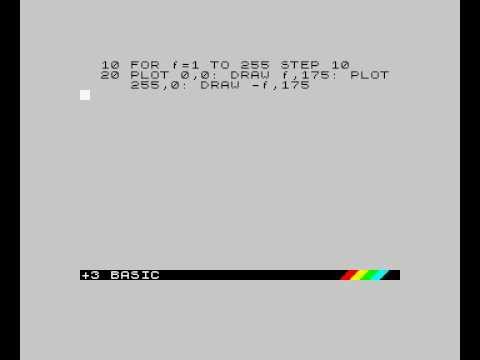
GOSUB 1000 for example, and just have to remember that 1000 was your screen-clearing routine or whatever. Horrible, and a nightmare when you’re writing terrible broken code rapidly iterating prototypes. With this, I can now write in a way that feels more natural after years with more modern programming languages and environments. So for example, here’s an abbreviated start of my code that draws the main welcome screen on the TNFS site:
@init:
  let savescroll=1
  let offset=6
  let c=20: gosub @clearscreen

@udg:
  restore
  data 0,0,0,255,0,0,0,0
  for n=0 to 7
      read char
      poke usr chr$ 145+n, char
  next n
  ...
  ...

@mainmenu1:
  let offset=6
  let c=17: gosub @clearscreen
  print at 4,3; paper 1; ink 7; "                         "
  ...
  ...
If you look at the screenshot taken from the Speccy, you’ll see how the labels and subroutine calls have all been automatically translated to line numbers, and the indentation has been flattened.
I had a few friendly chats with that user from the Spectrum Computing Forums and we worked on a few additions to zmakebas together, adding support for Spectranet commands and fixing a few other minor bugs. Thanks for all the help, “flatduckrecords”!
It’s simple to build from that repo on a stock distribution with build tools installed: A quick make leaves you with a binary that you can copy into your $PATH.
z88dk
z88dk is a C compiler targeting the z80 (yes, really!). It can output executable code for a variety of old systems, the Spectrum included. I haven’t yet written any C code for this project, but I did need a compiler to build SnapCTerm so I could add a telnet console to the site, so a user can jump straight into the many telnet BBSes still running.
As a bonus, they have a Docker image along with their other Downloads.
Docker
I’m a big believer in creating containerised reproducable builds for my development tools. It really helps keep things portable among any system with a OCI runtime available, and has the great advantage that they can also be used in CI/CD workflows.
Using the z88dk container as my base, I built a new tools container that included Pasmo and my patched zmakebas. I’ve added this container to my CI/CD pipelines and it’s publicly available on Docker Hub at markdr/zxdev, if you want to try any of this yourself. Using this image I can build my code in the container, mapping in the directory holding my code like so:
docker run --rm -ti \
  -v $PWD:/src \
  --user $(id -u):$(id -g) \
  markdr/zxdev \
  pasmo --tap 64.asm 64.tap
Graphics
Although the site is written primarily in Sinclair BASIC, I still wanted to jazz it up a bit. Unfortunately, the Spectrum is not exactly a graphical prodigy; even amongst it’s peers of the time it compared poorly against the C64 and CPC range for example. Although I’d argue its ridiculous attribute-clash issues and garish palette lent the Spectrum a certain “crap, but in a loveable way” aesthetic charm! It’s amazing what can be done given limitations such as “no more than 2 colours in an 8x8 character square”.
Pixel art
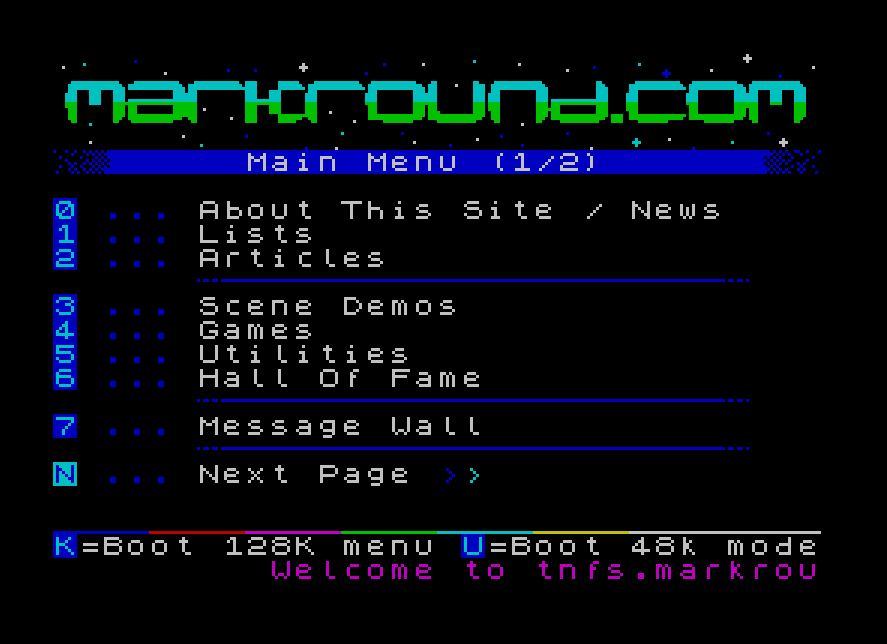
A quick win to make the site look more appealing is a simple header image and placeholder for the menu/section title. This does mean sacrificing 5 text rows out of the available 22 (the last 2 8-pixel high rows of the standard Speccy BASIC screenmode are reserved for error messages and user input) but I think I still managed to get a half-decent effect. I used ZX Paintbrush running under Windows to draw the font-based logo.
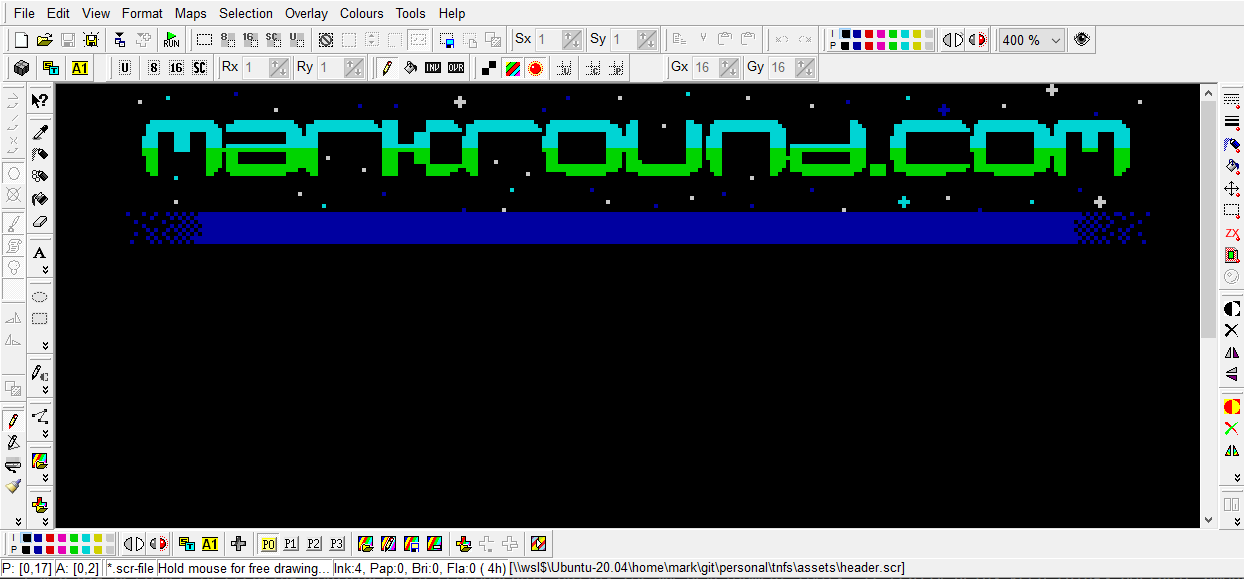
I used a TTF font I’d used before on my musical projects and coloured it in. For Nostalgia’s sake, I saved the image in the Spectrum’s native SCREEN$ format (a dump of the 6912-byte length screen memory from address 16384 onwards - I still remember that from back then!) and loaded it into The Artist II, which I used as a kid.
UDGs
Another way a text-mode BASIC program can look a little snazzier is to make use of User Defined Graphics which allow you to extend the Speccy’s character set with your own 8x8 blocks. If you look at the menu code shown earlier, you’ll see the POKE commands being used to define the dithered separator lines used in the main menu. Fortunately, there are again easier options today than the original method of hand-drawing things out on school graph-paper and converting from binary!
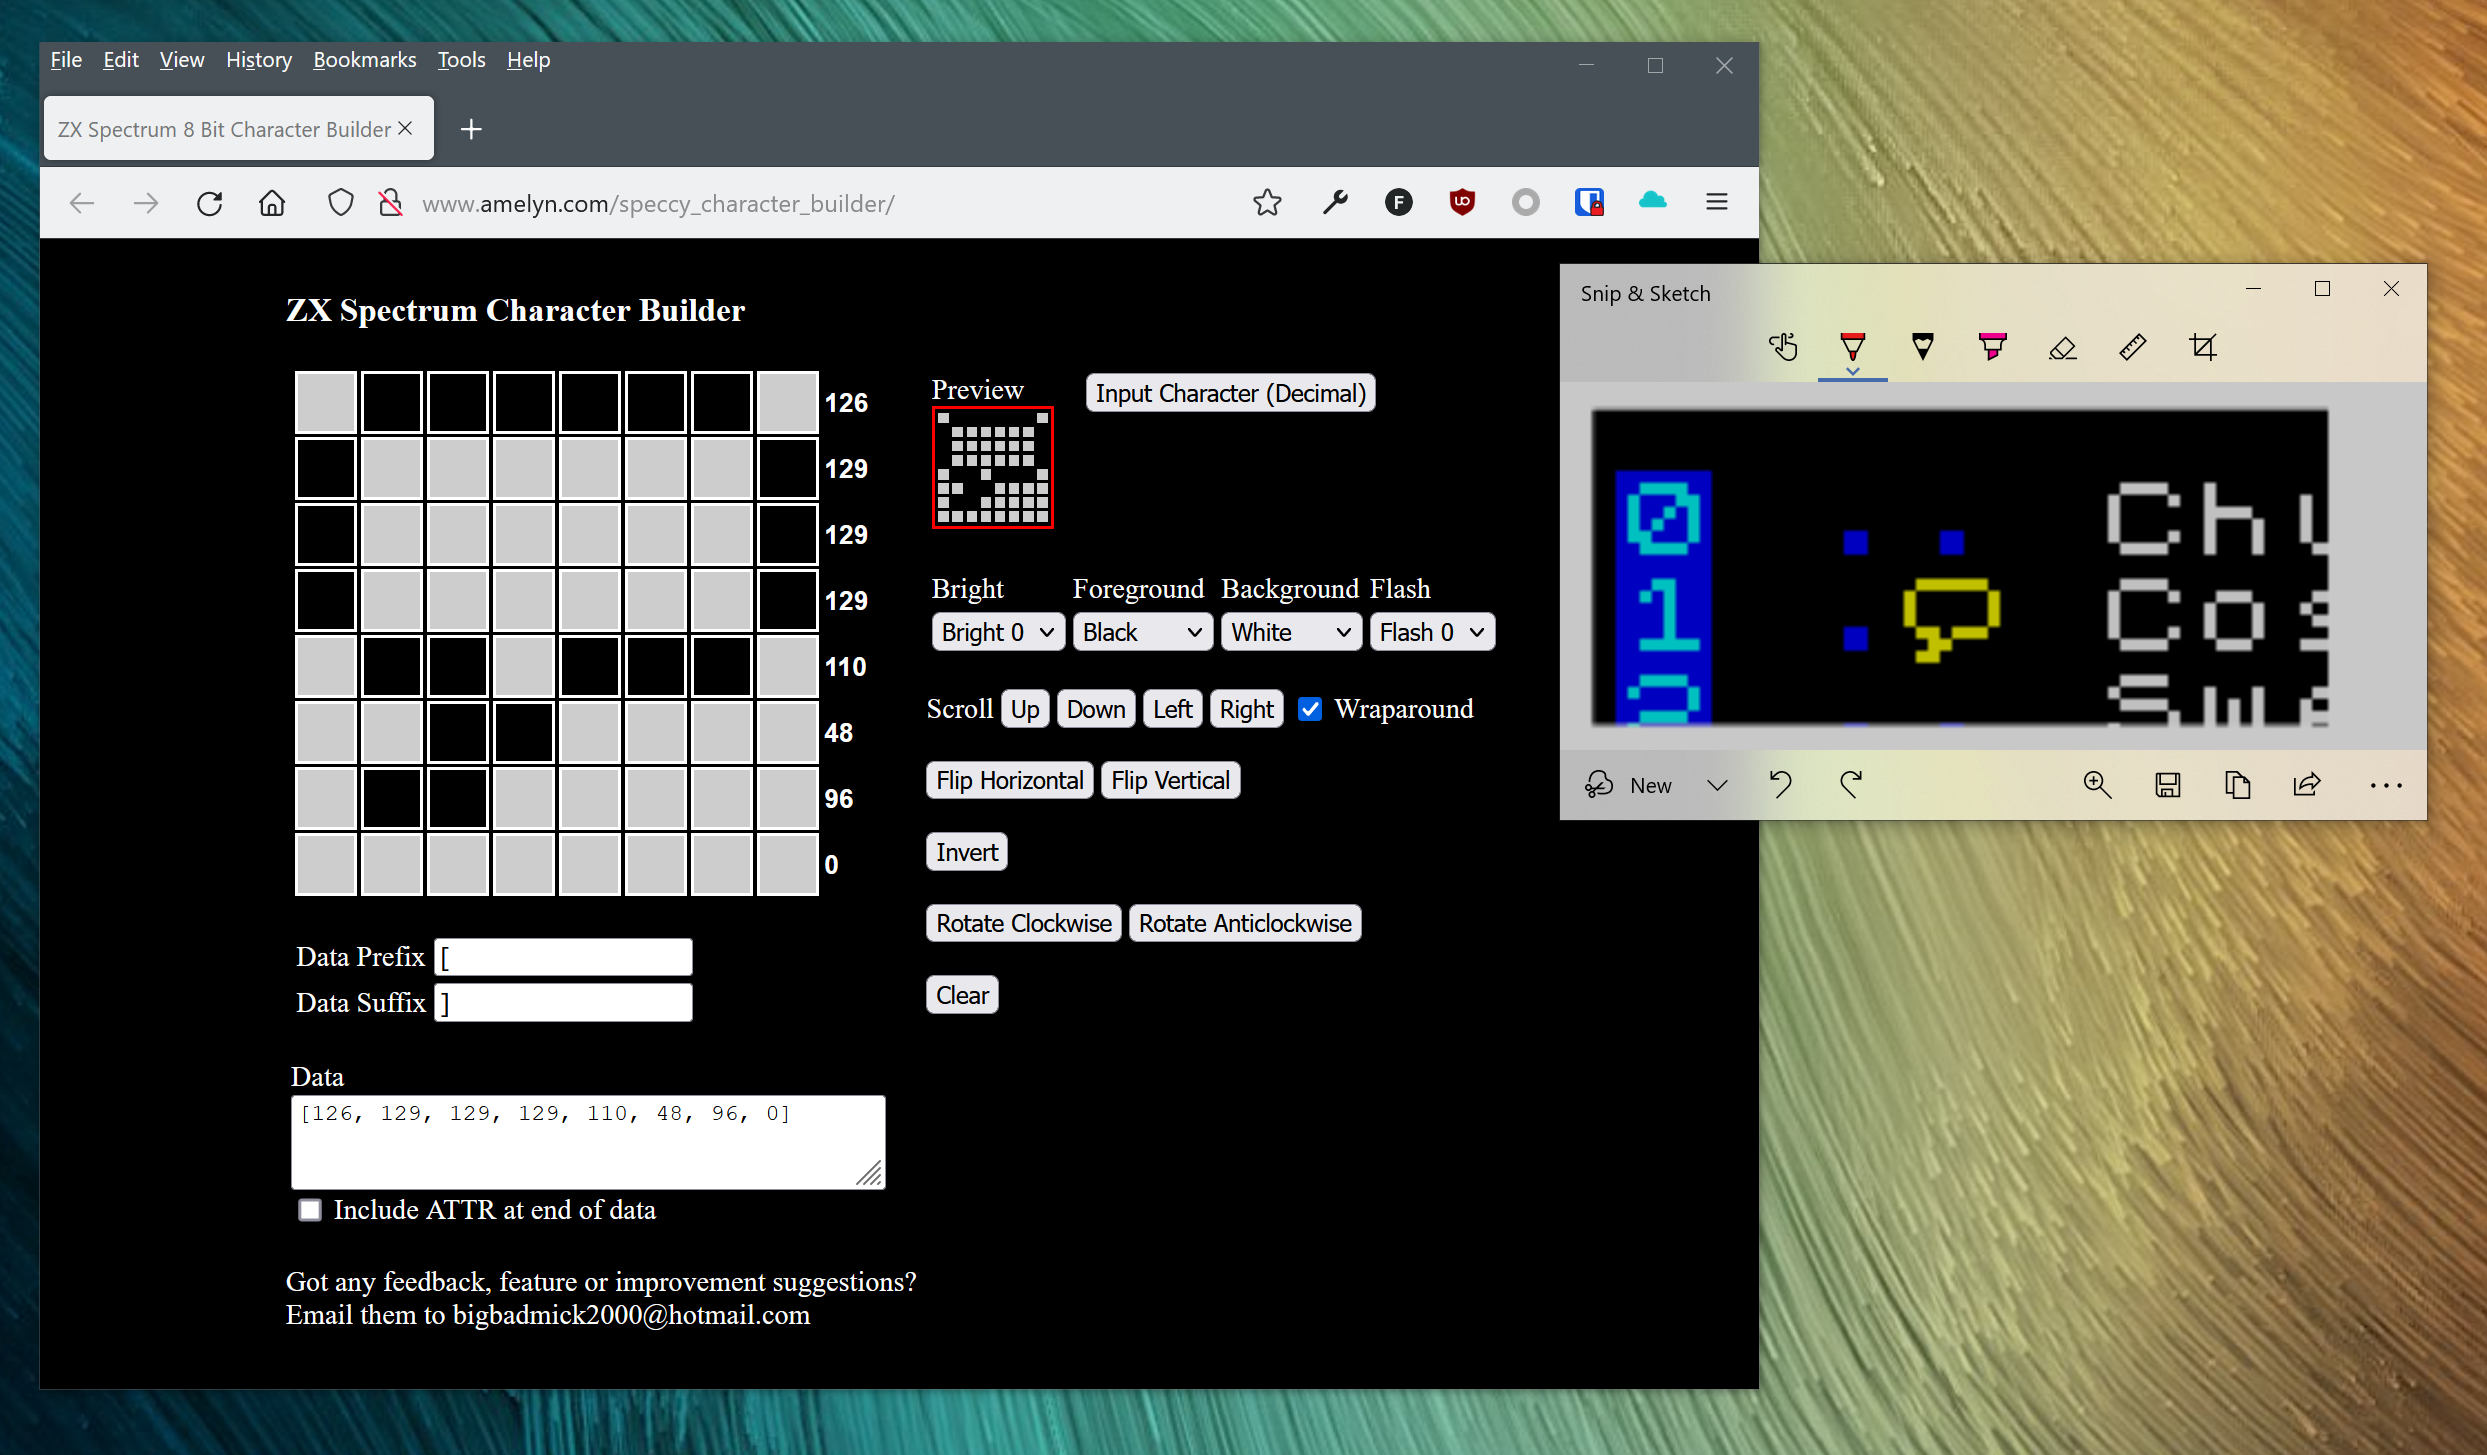
DATA 0,126,129,129,129,110,48,96 if you were curious…)
64-character mode
1
2
3
4
@init:
  clear 49999
  %load "/64.tap" code
  randomize usr 50000
It makes use of the little-used streams facility built into Spectrum BASIC so you can simply print to channel #4 to fit a lot more characters on the screen at the expense of a slight decrease in readability:
1
print #4; "Hello 64-character world!"
I managed to get colour into this driver with some limitations (more details in Part 3) and also used little tricks from the past like building the menu separator bar at the bottom using coloured undercore characters. In short, I tried to make the site as appealing as it could be given the limitations I had to work with; not least being my own rusty 8-bit graphical “skills”!
Next steps
Continue on to Part 2 where I discuss the server-side components and build the first iteration of the site.